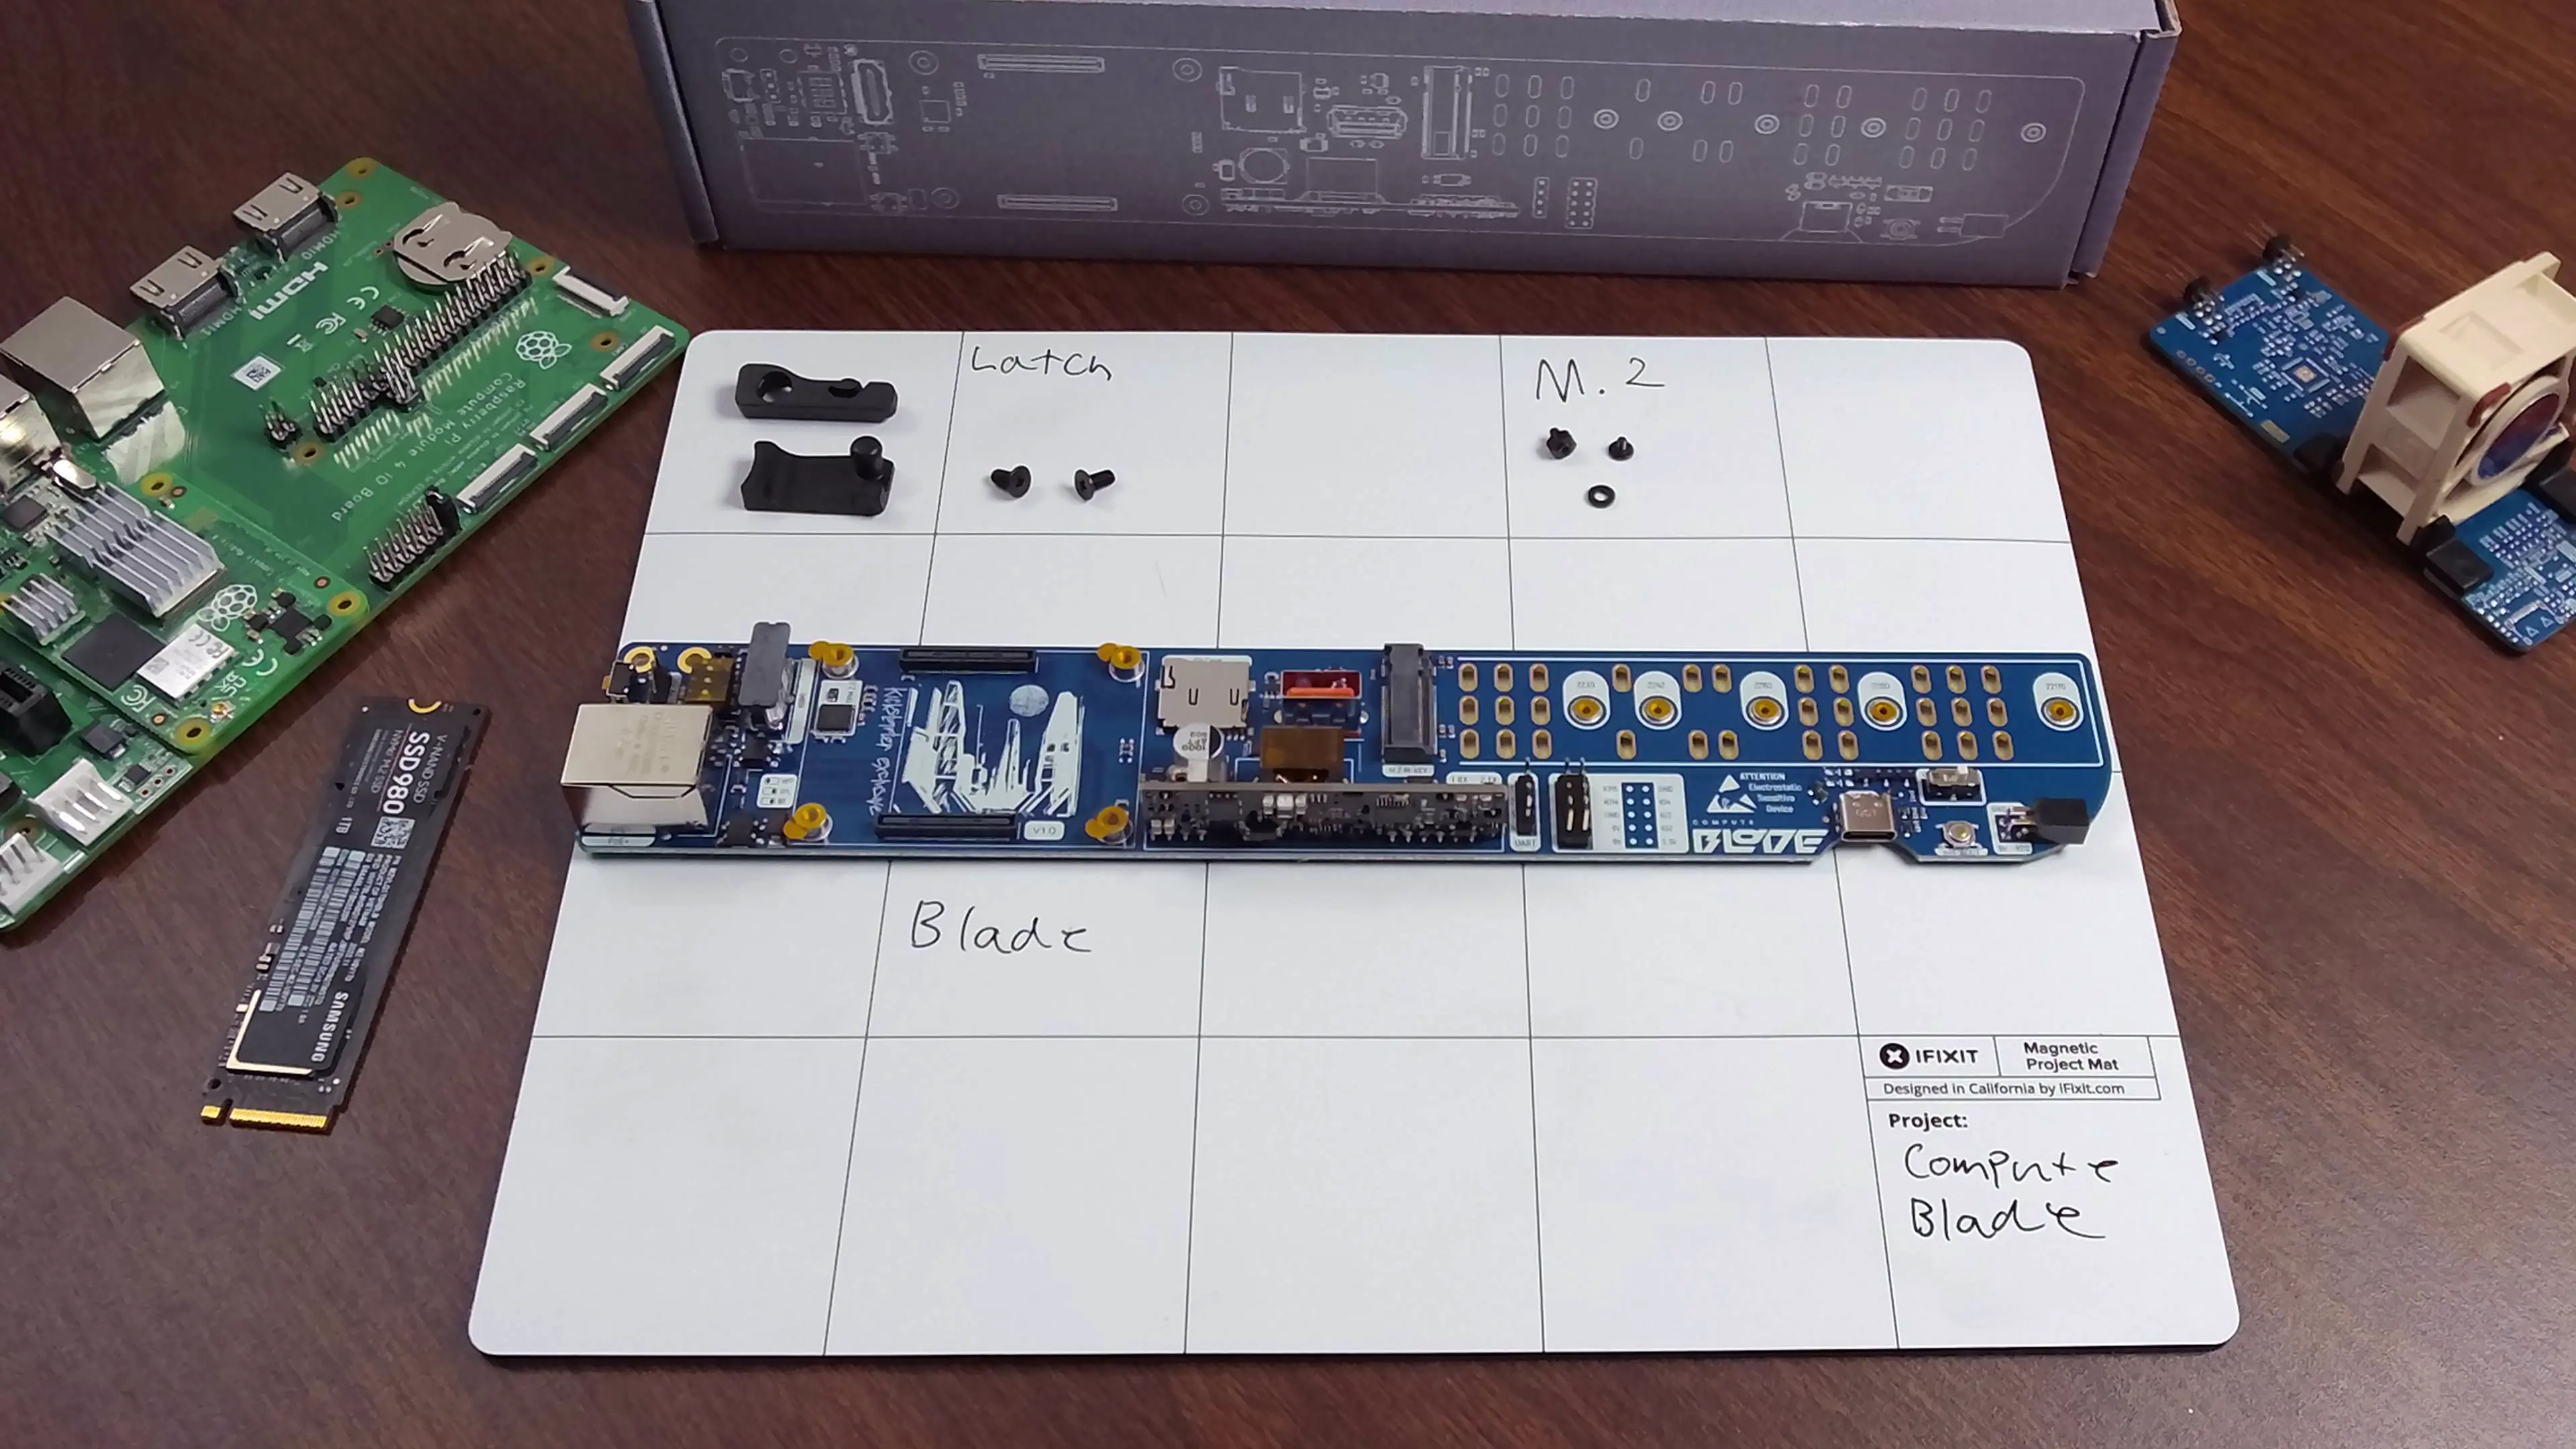
Assembly
When you get your Compute Blade, the box will include:
- Compute Blade
- Latch Lever
- Latch Anchor
- x2 M3x6 Screws
- M2x2.5 Screw
- M2x2.5 Standoff
- M2 Nylon Washer
Out of the Box
Removing the Blade from the box it will be wrapped in bubble wrap. The Latch and other hardware will be a separate bag in the box.
From the factory the Blade will have Kapton tape on all of the threaded mounting points and the DIP Switches(if dev model). Remove the tape.
Latch
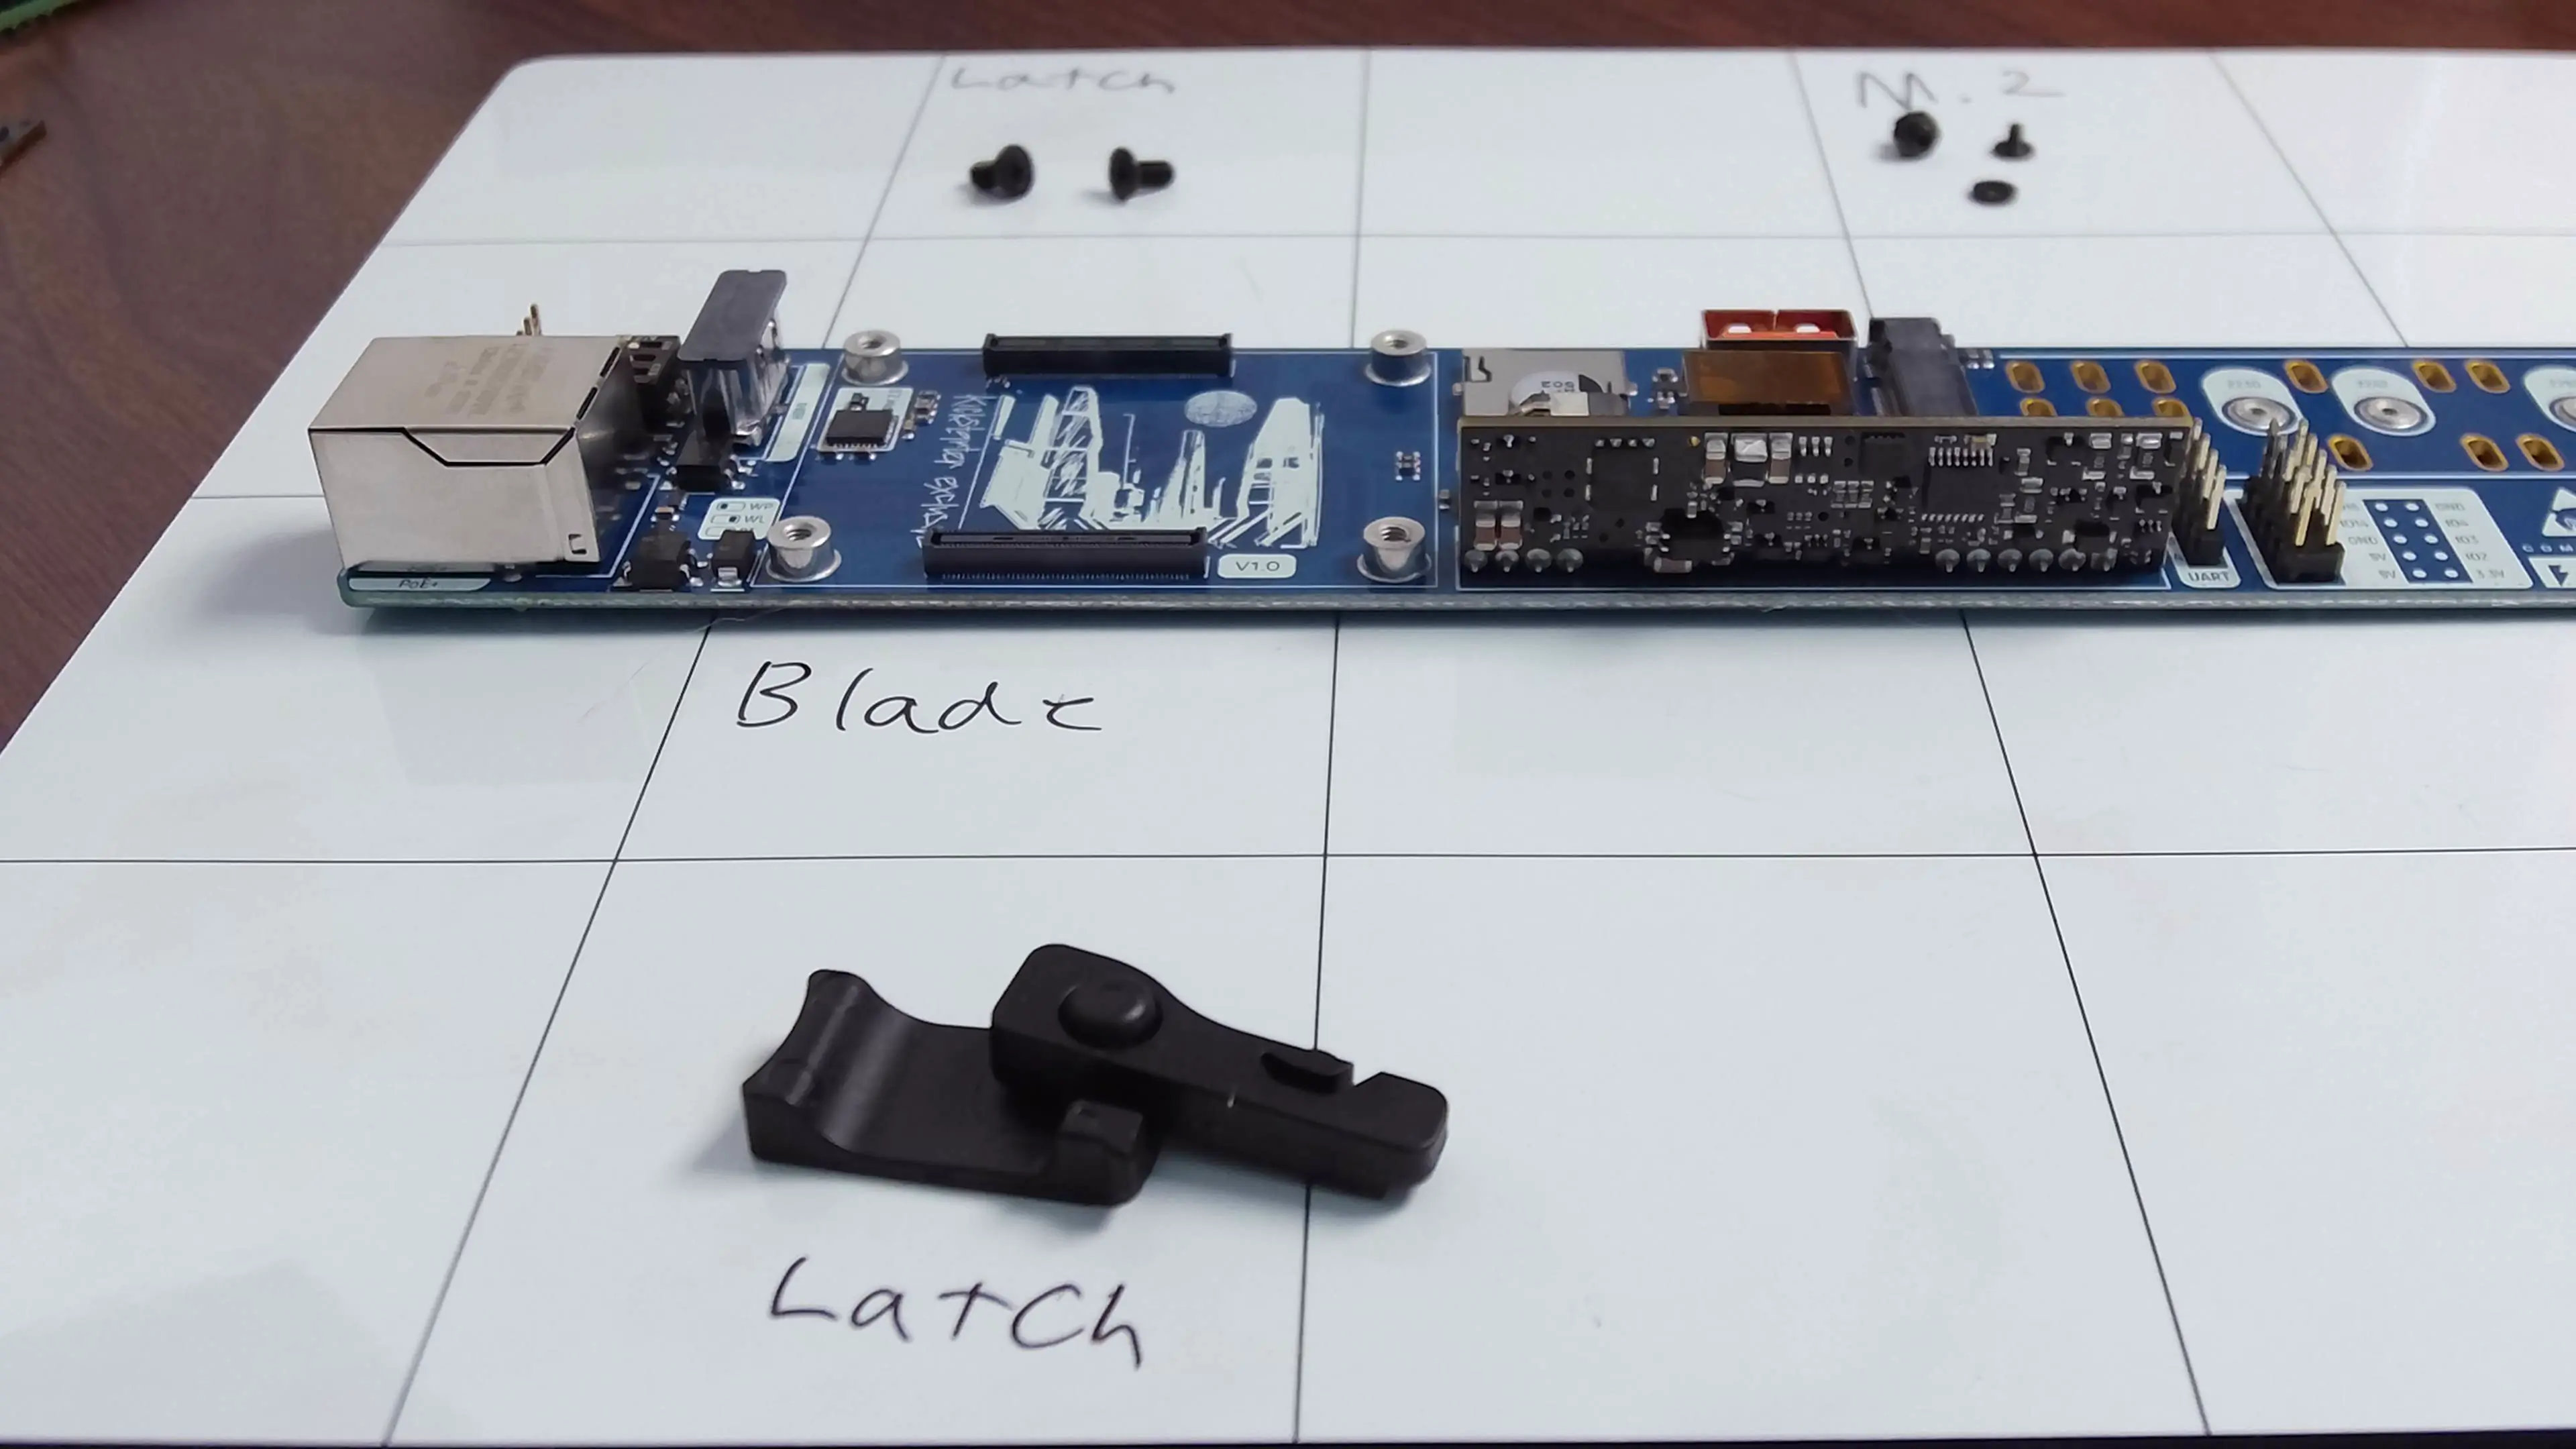
The latch comes in two parts:
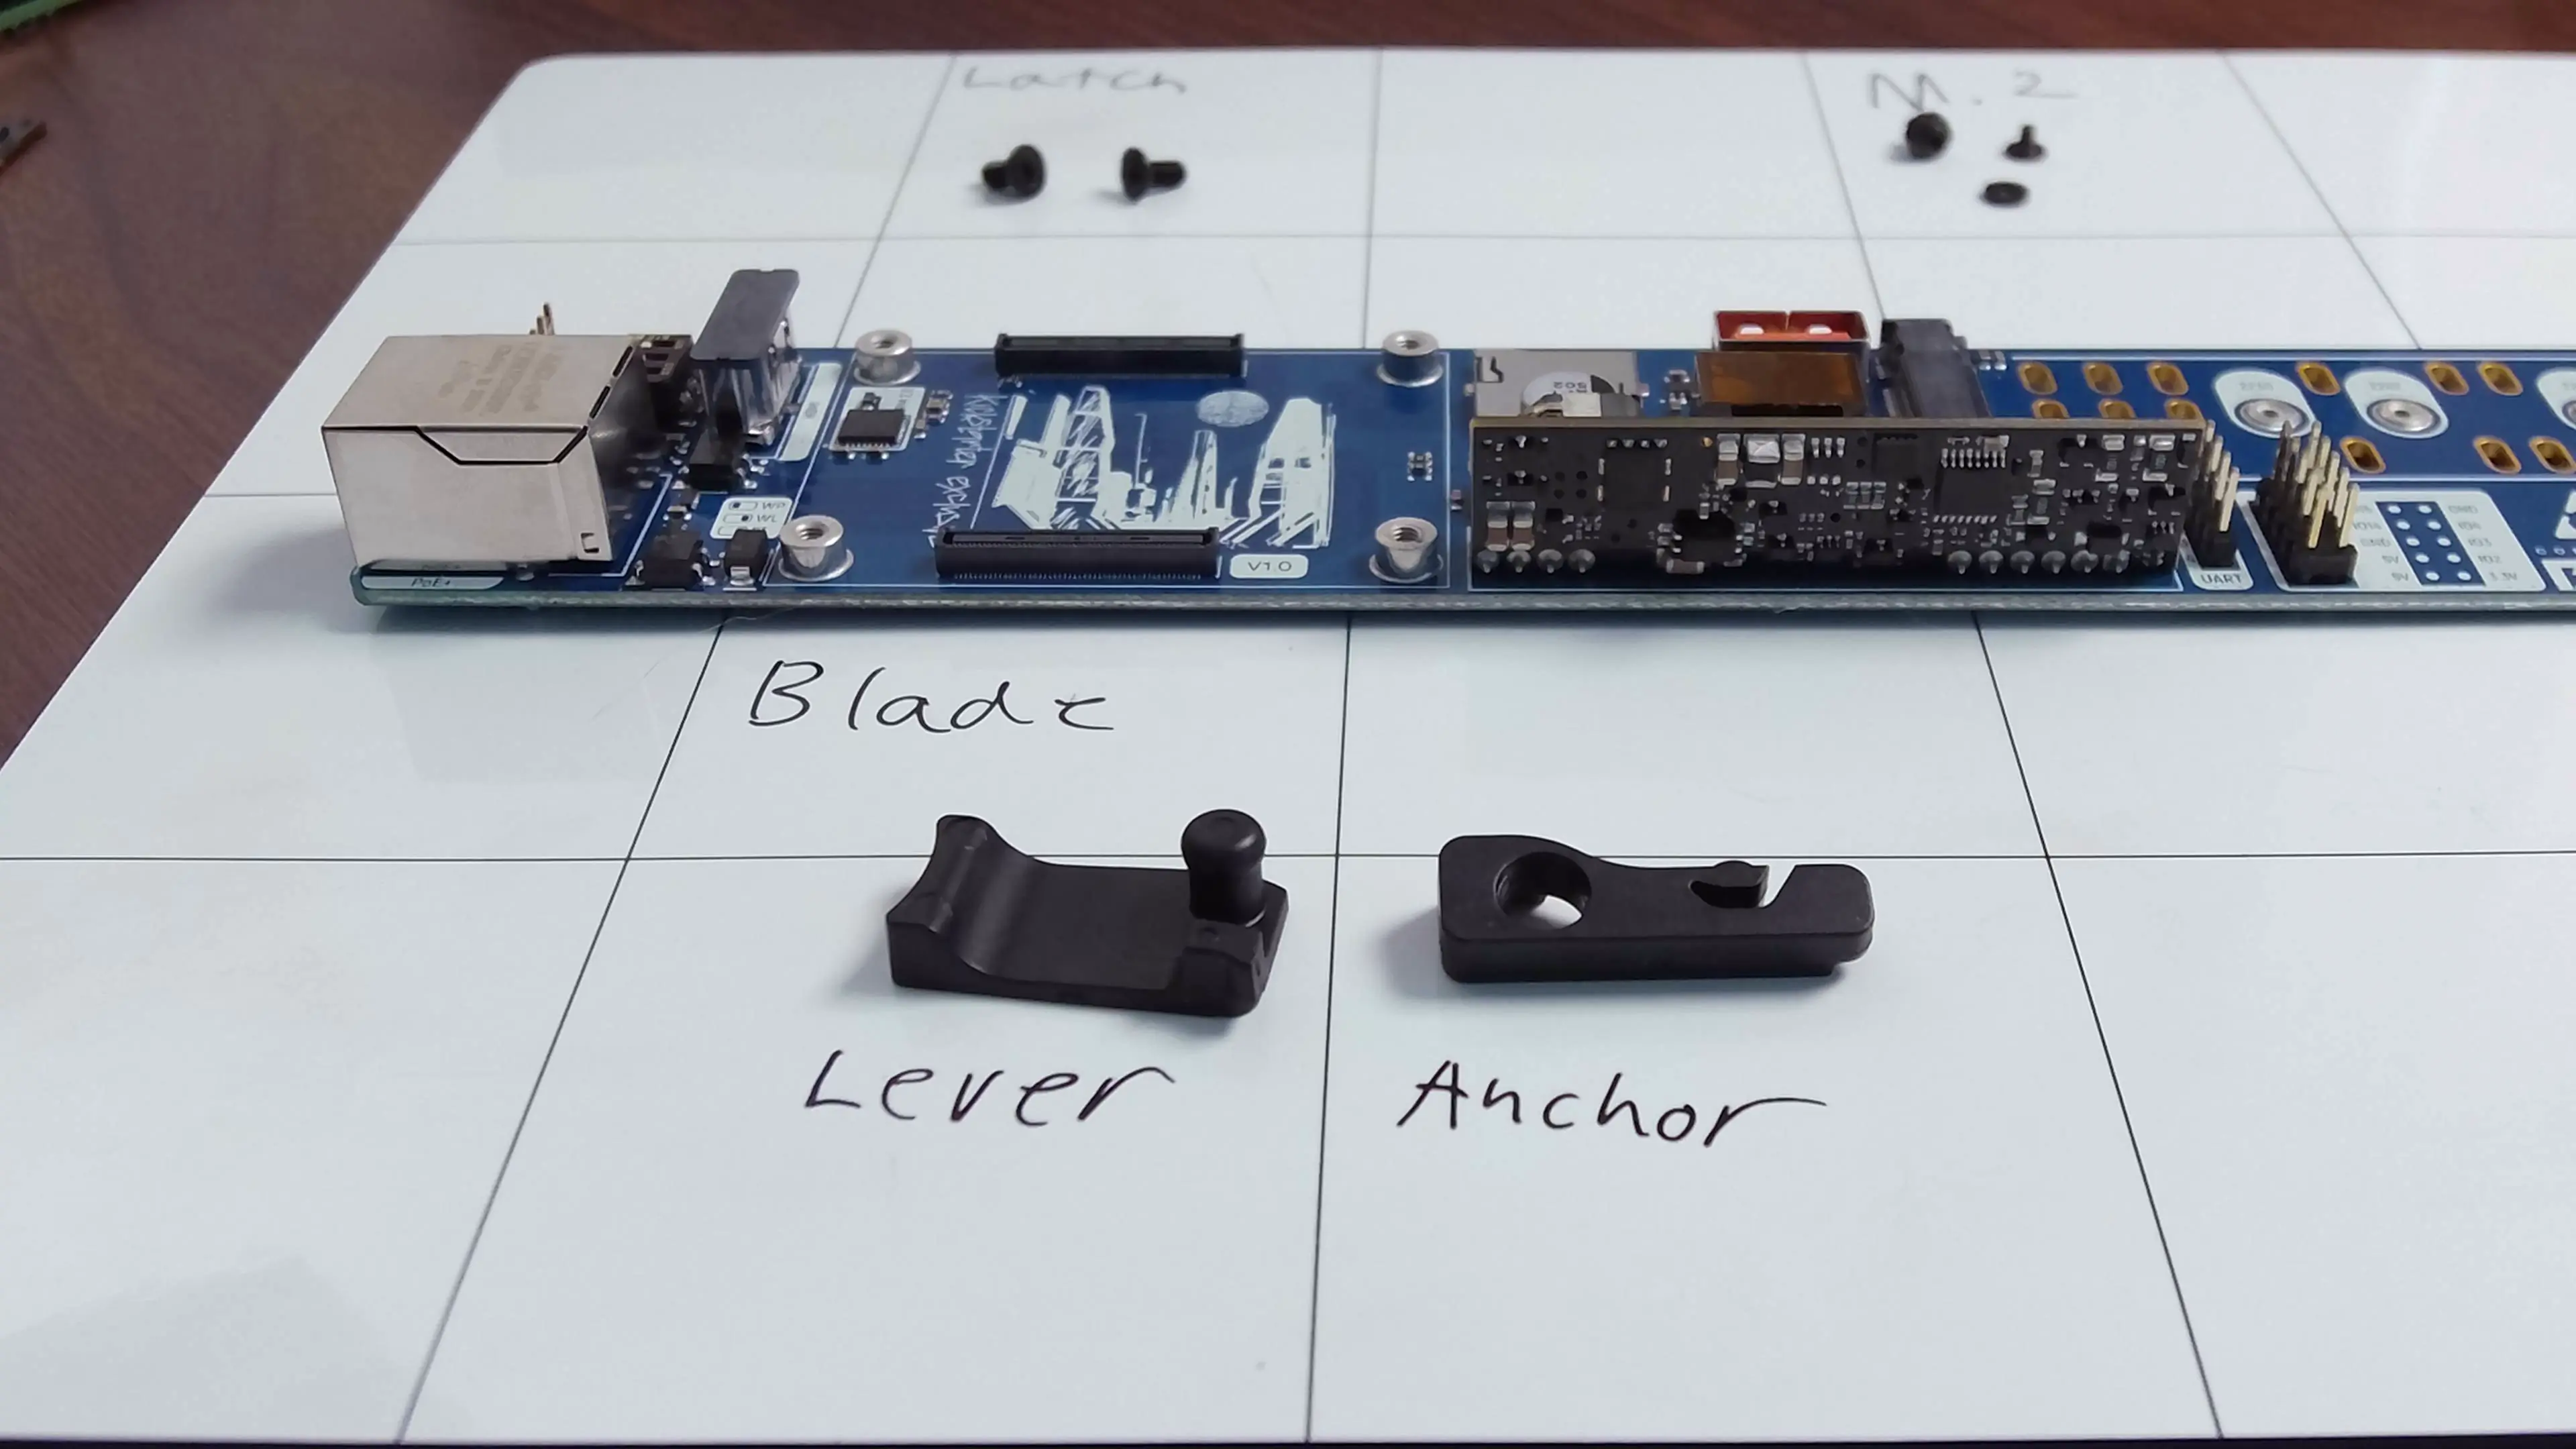
To assemble the two parts place the "lever" with the flat side down, then place the "Anchor" with the two mounting holes facing the table as shown in the image above. Next press firmly until the pieces snap together.
Be sure to assemble the two parts correctly; it is difficult to separate them and can damage the latch.
Models for the latches can be found on GitHub
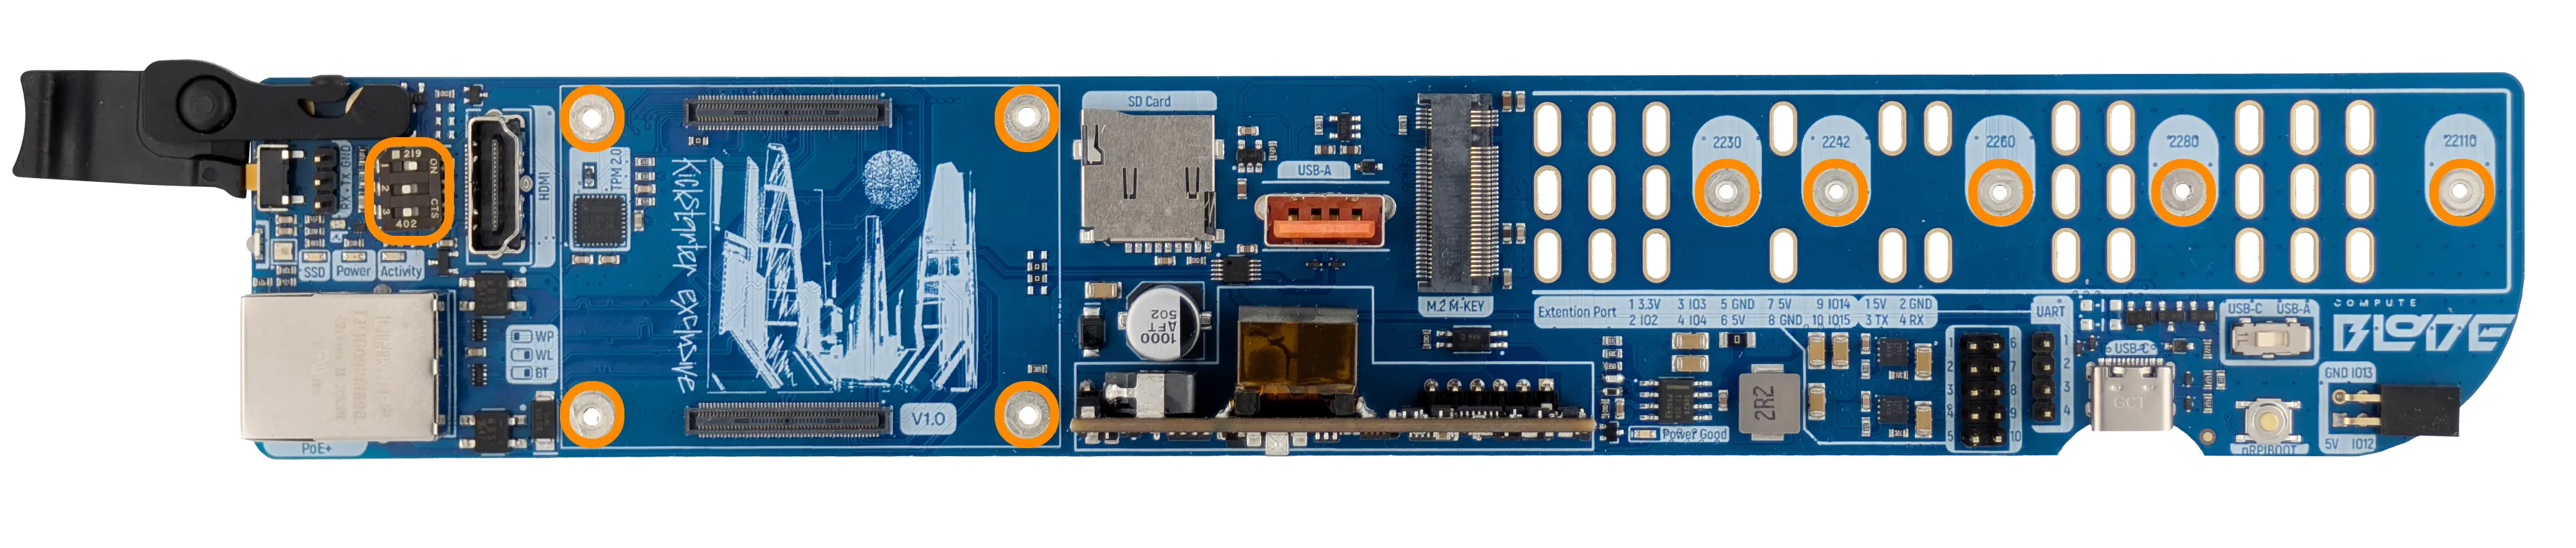
With the Latch assembled it can be secured to the blade. Using a PH1 screw driver, take the two M3x6 screws and secure the latch to the blade.
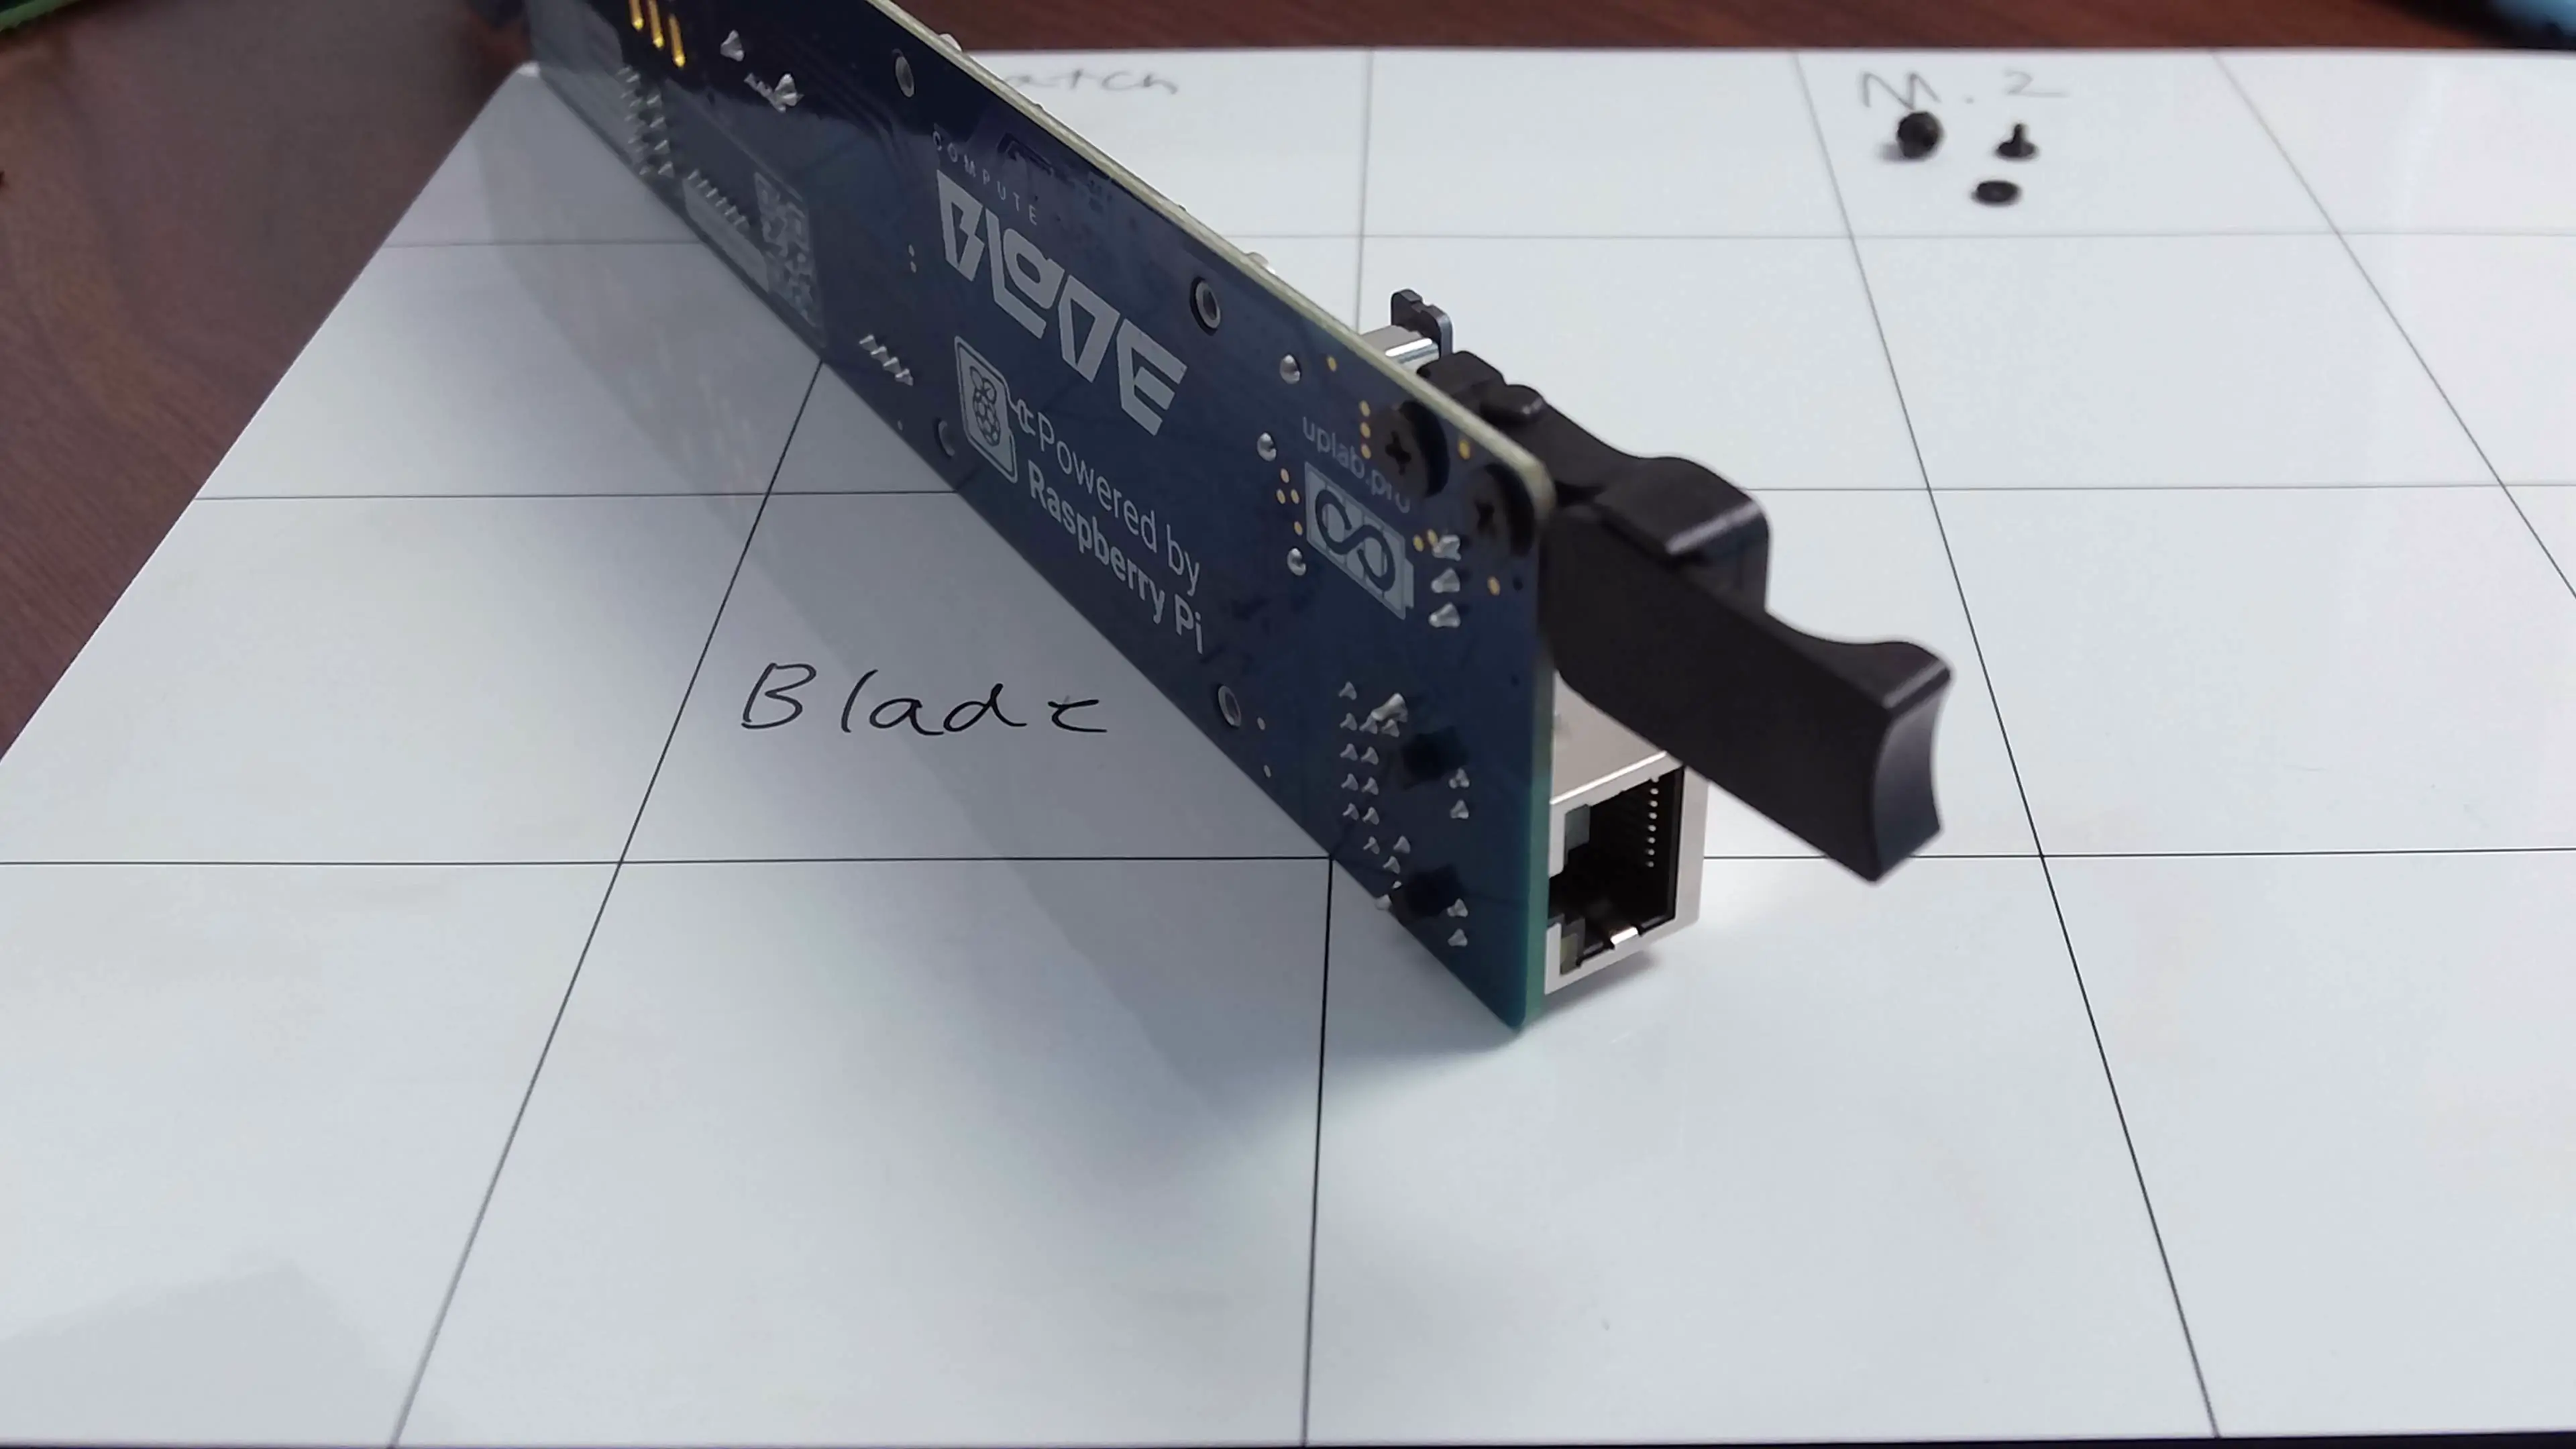
The latch is now assembled and attached to the Compute Blade.
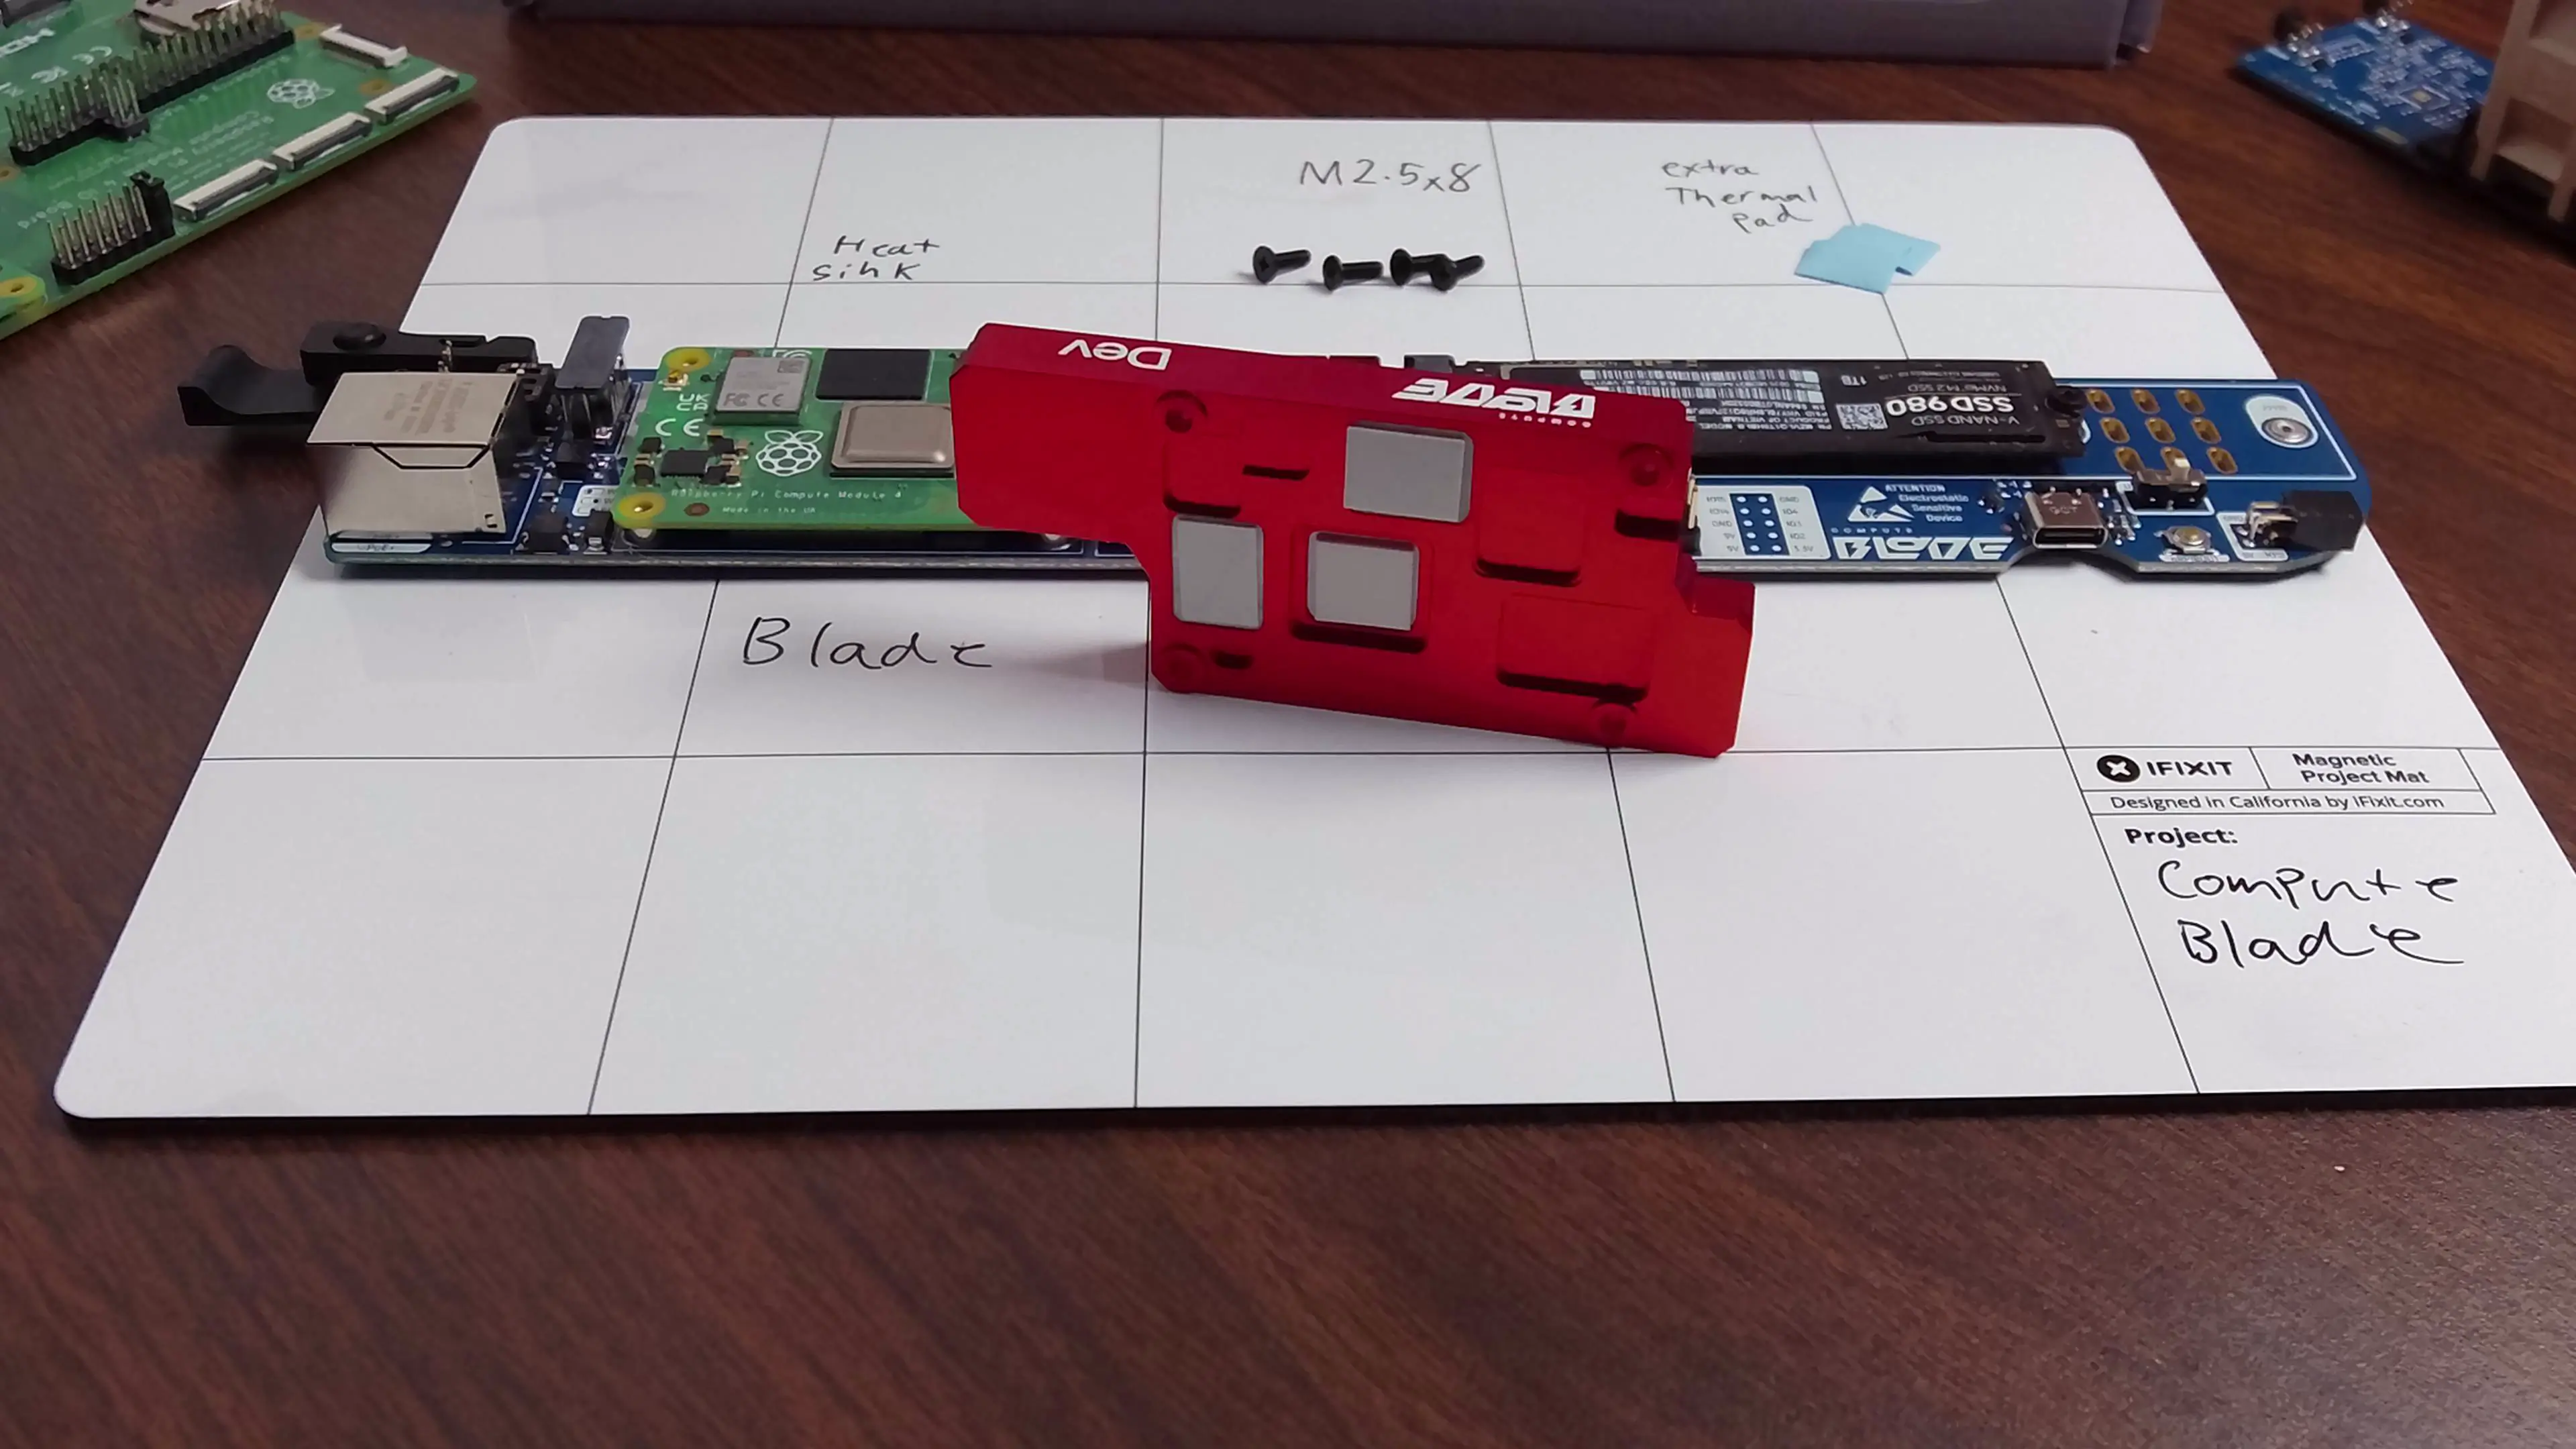
M.2 Slot
The Compute Blade has 1 M.2 M key slot for expansion, which supports devices from 2230 to 22110. This slot can be used to for Storage, hardware accelerator, or even a GPU.
If you are unsure about which threaded insert to put the standoff in check the M.2 Slot page
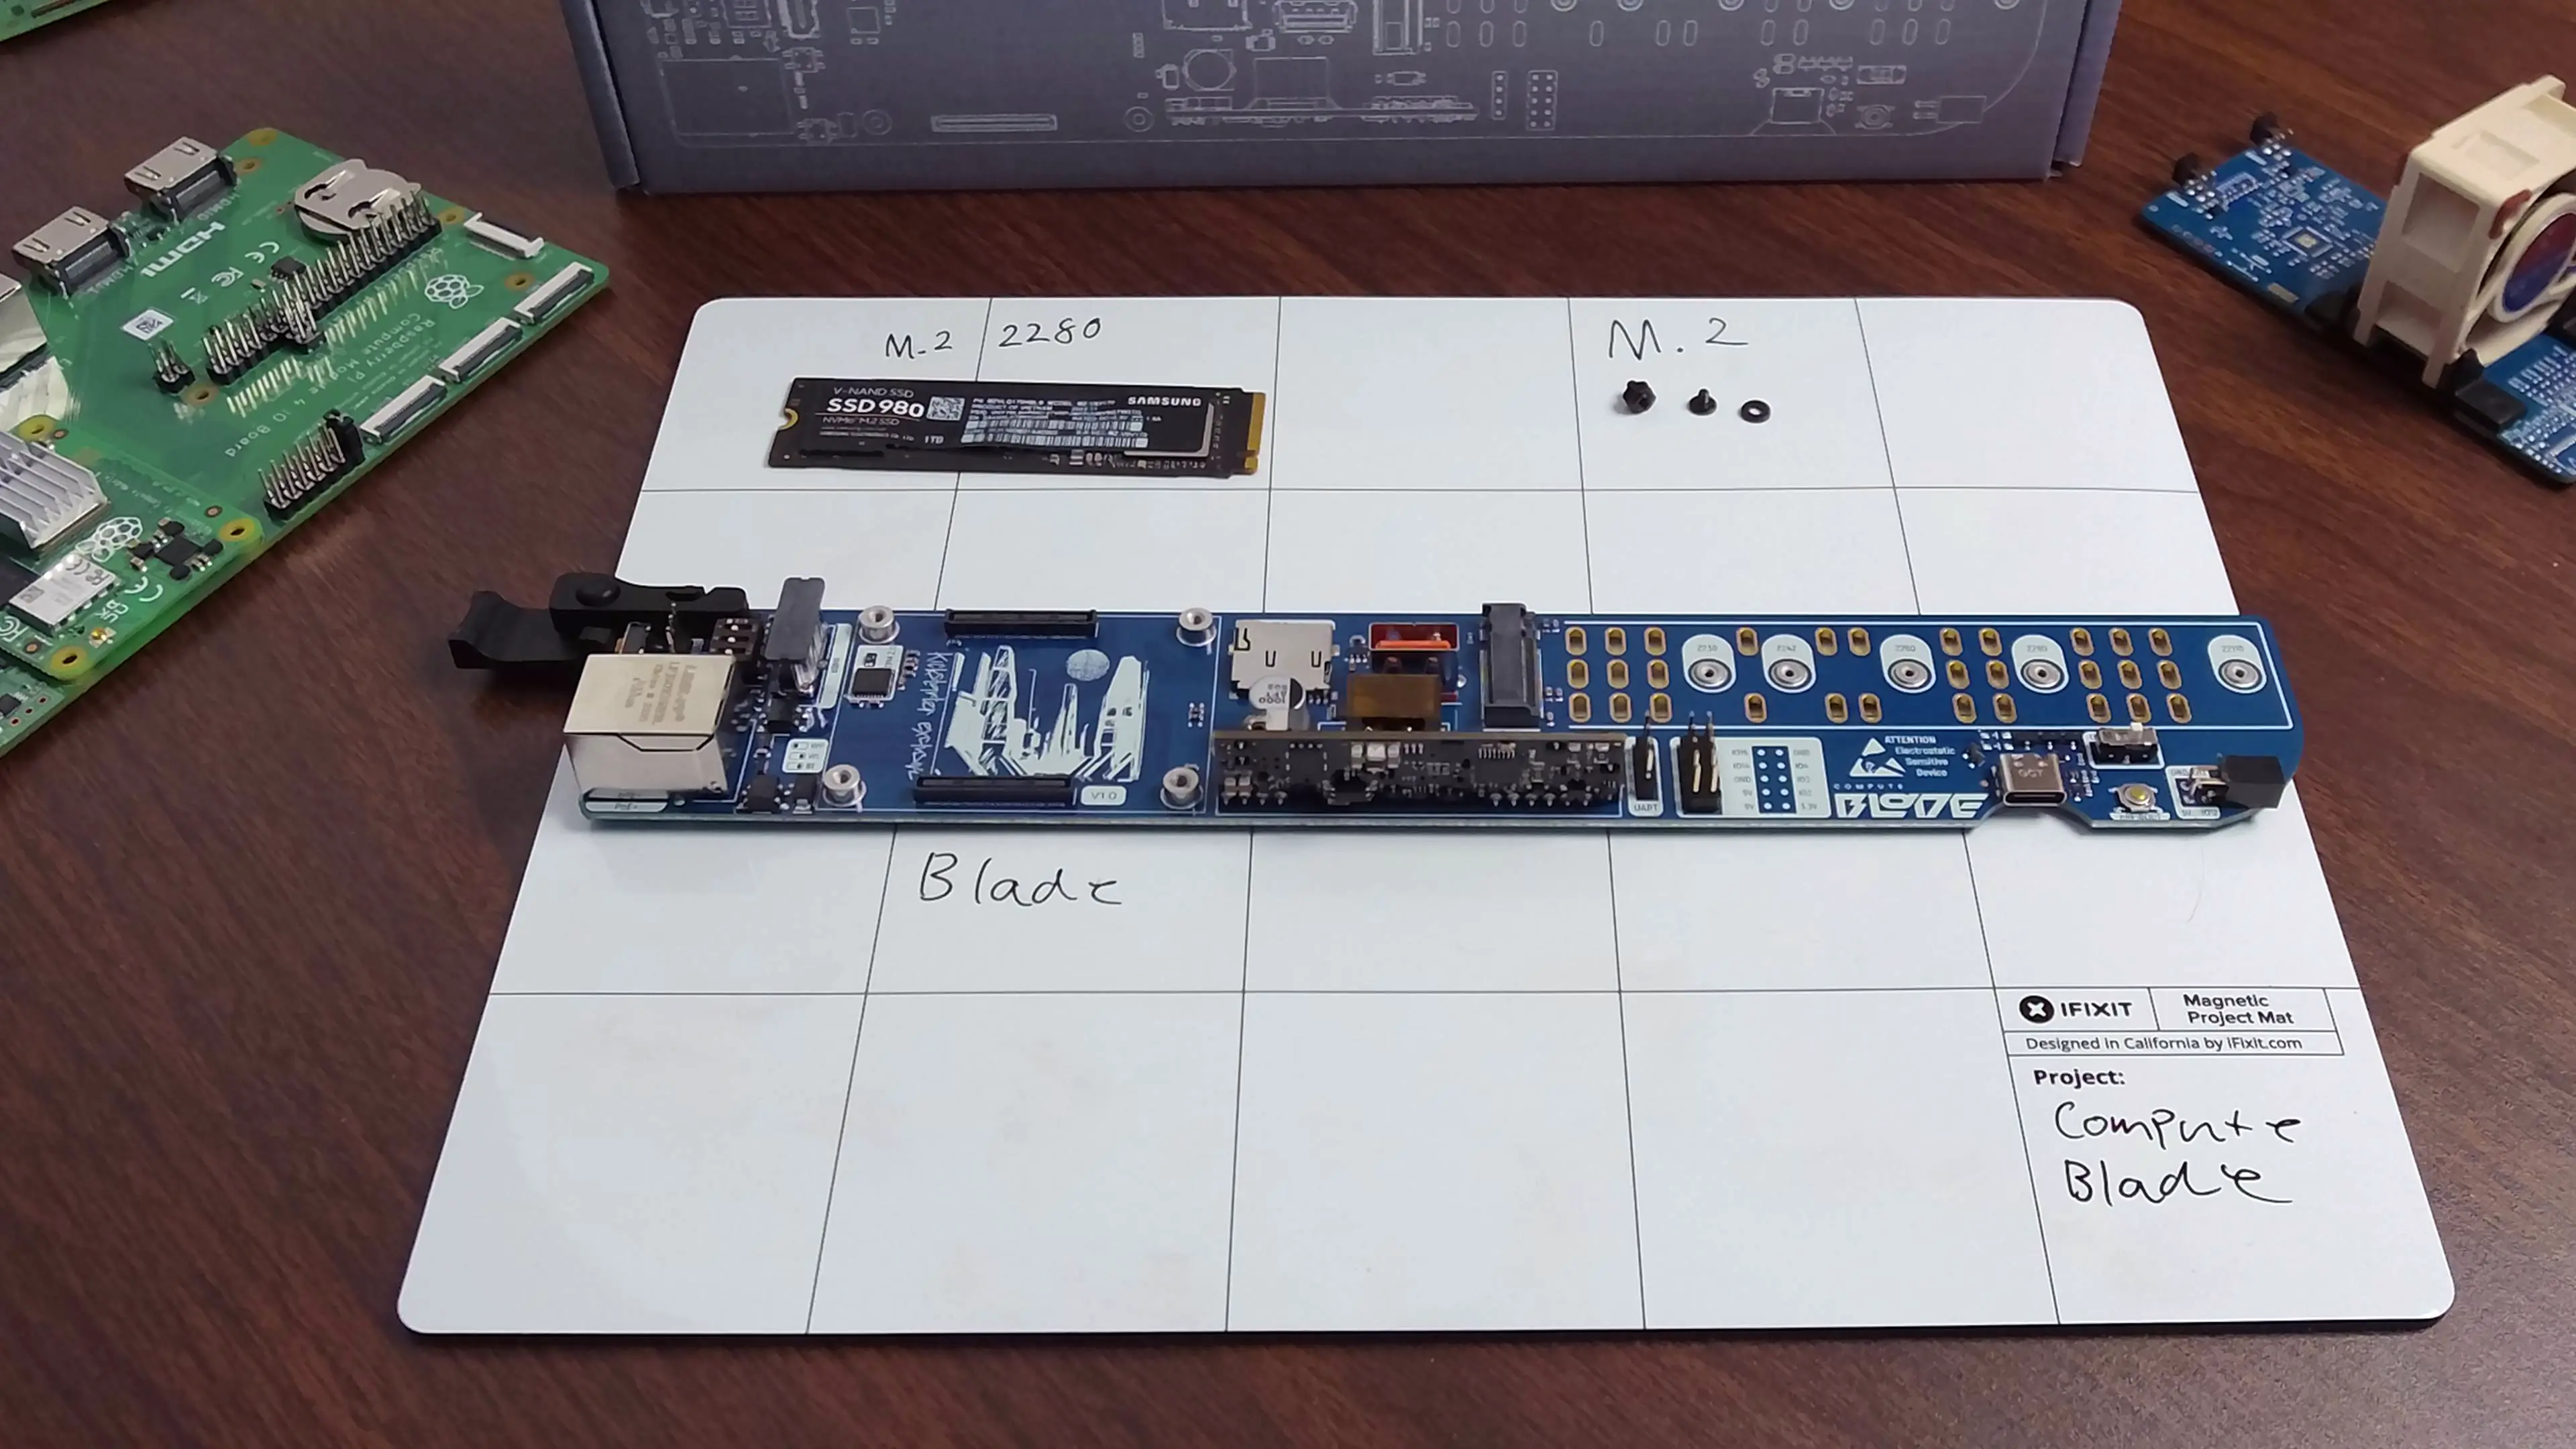
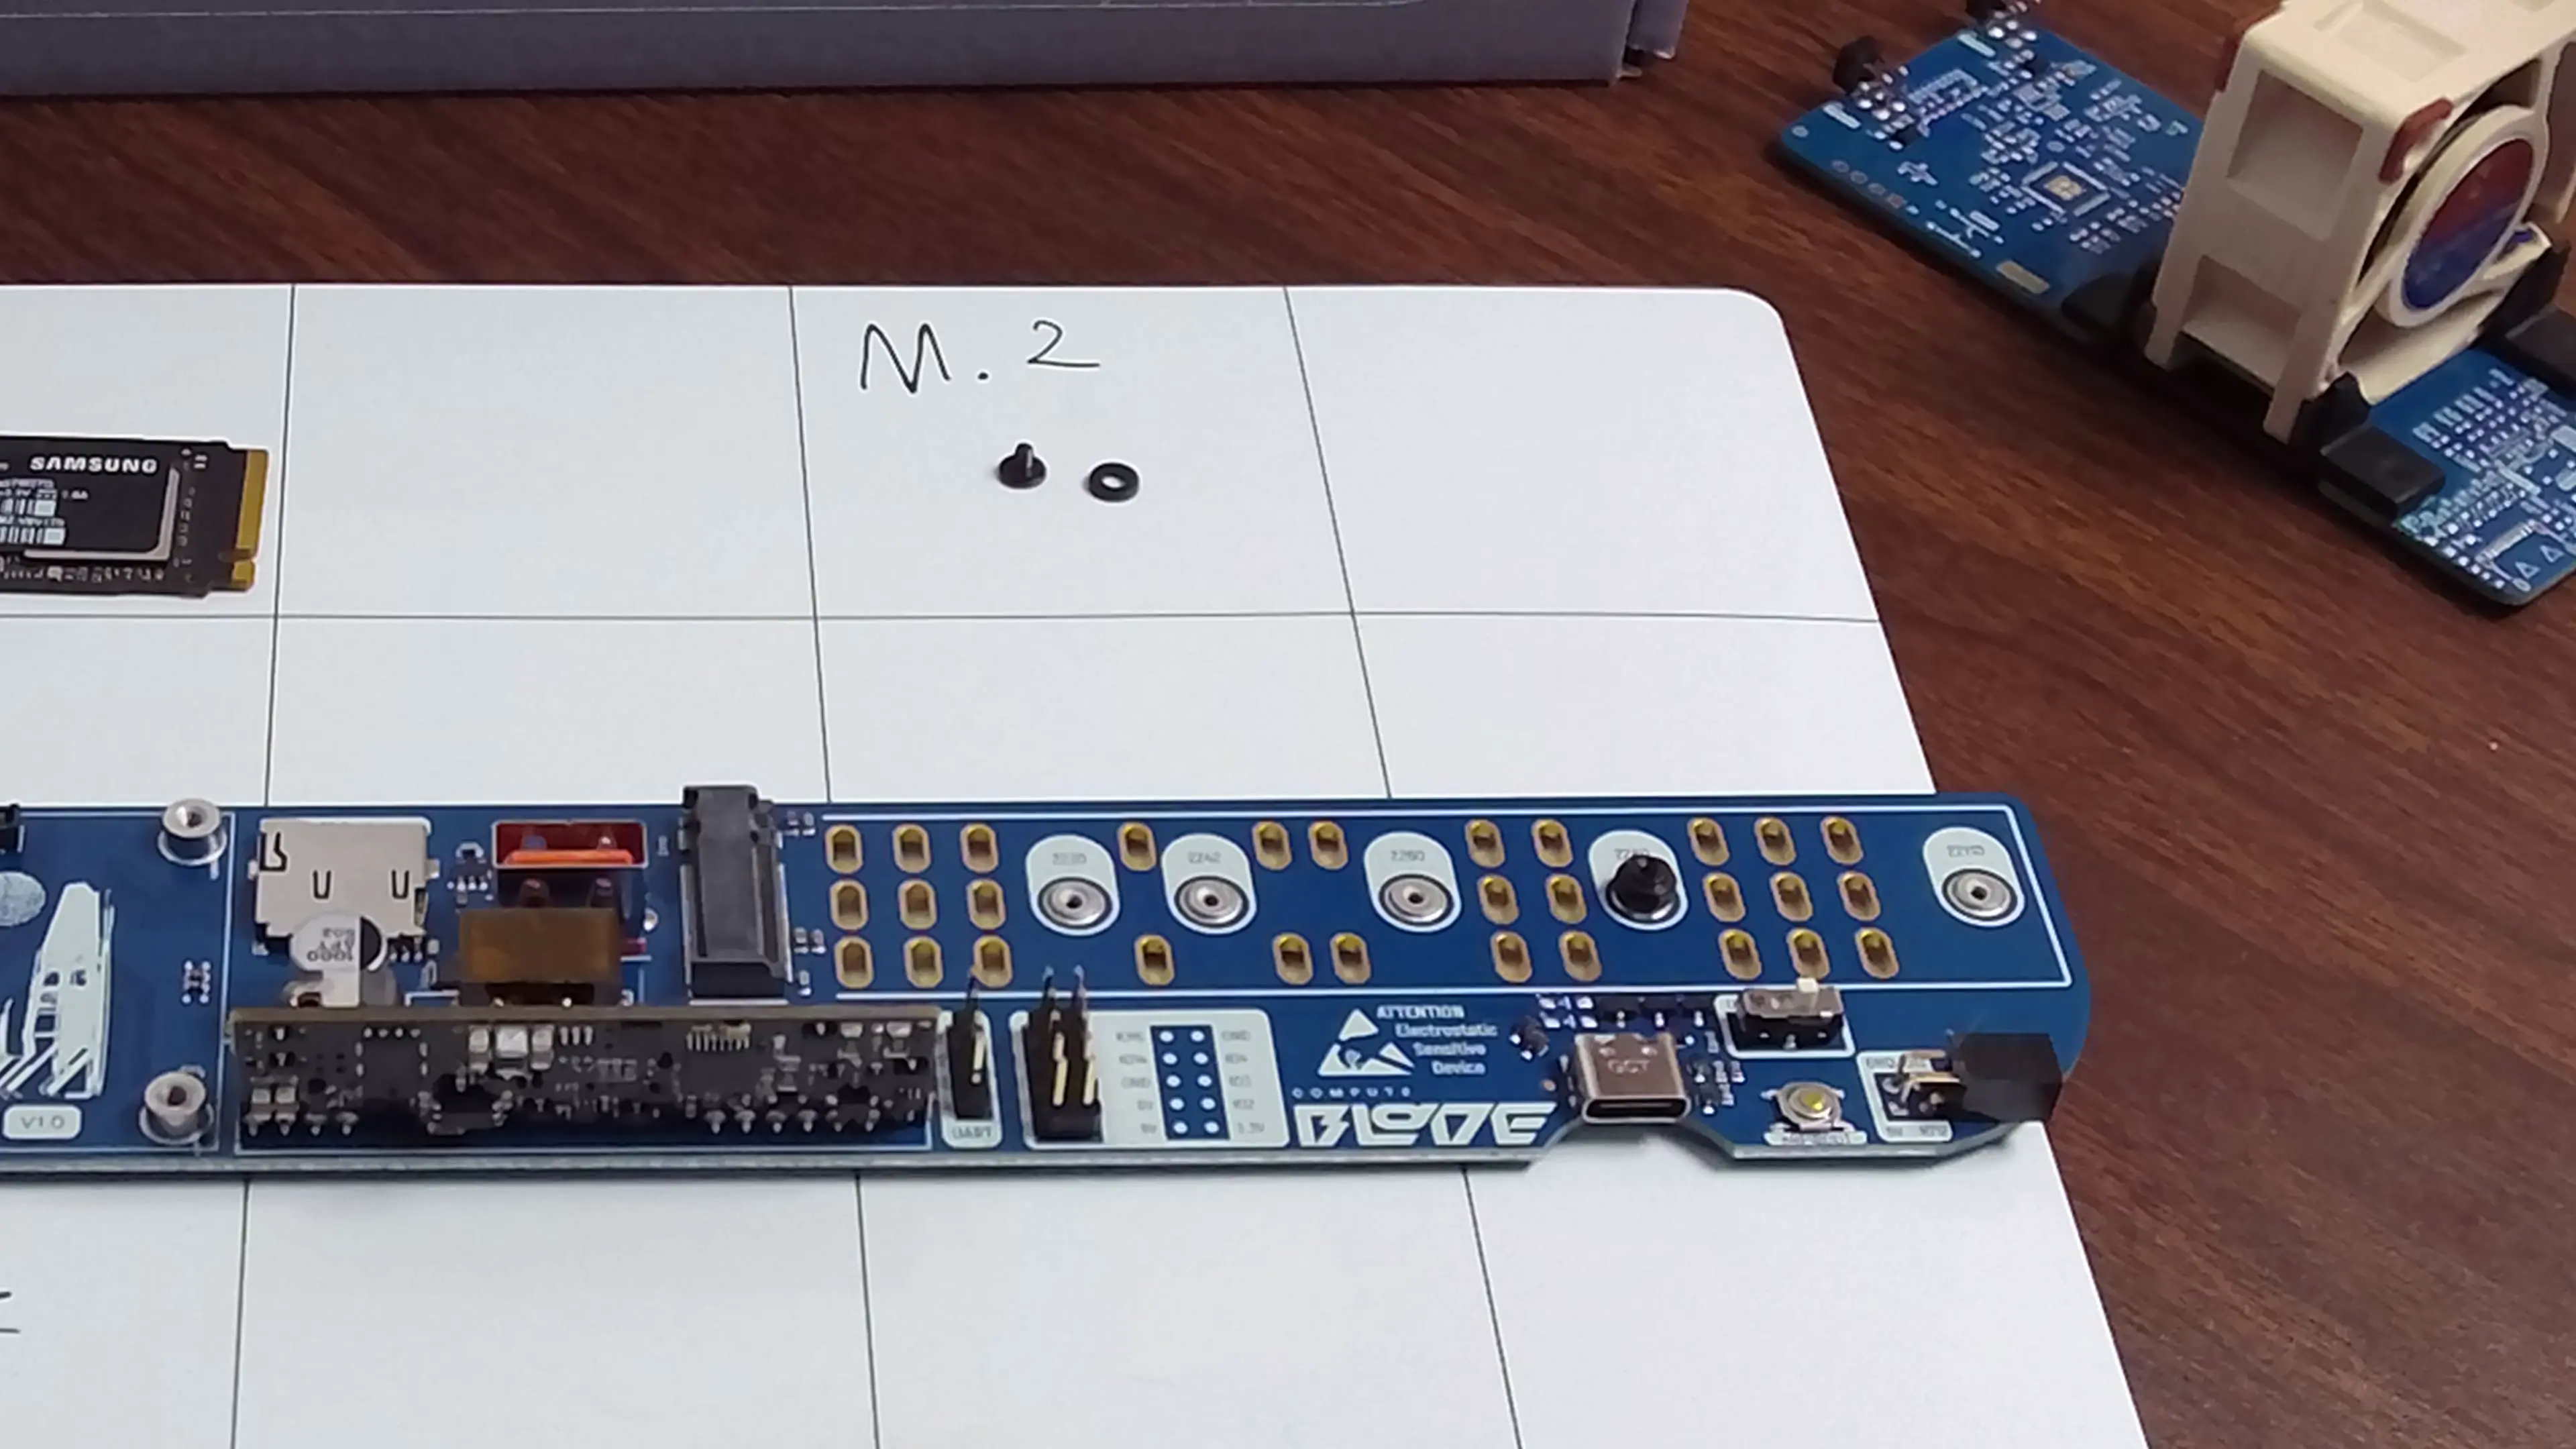
To use the slot, screw the included M2x2.5 standoff into the threaded insert corresponding to the size of your M.2 device using a 5mm hex driver. The bellow picture shows a Samsung SSD 980 which is a 2280 M.2 M key device.
If installing an NVMe SSD, you may want to install an Operating system first. See our imaging guide
Place the M2 nylon washer on the M2x2.5 screw and insert the M.2 device at a 30° angle.

Finally, using a PH1 driver secure the M2x2.5 screw with the M2 nylon washer to the standoff.
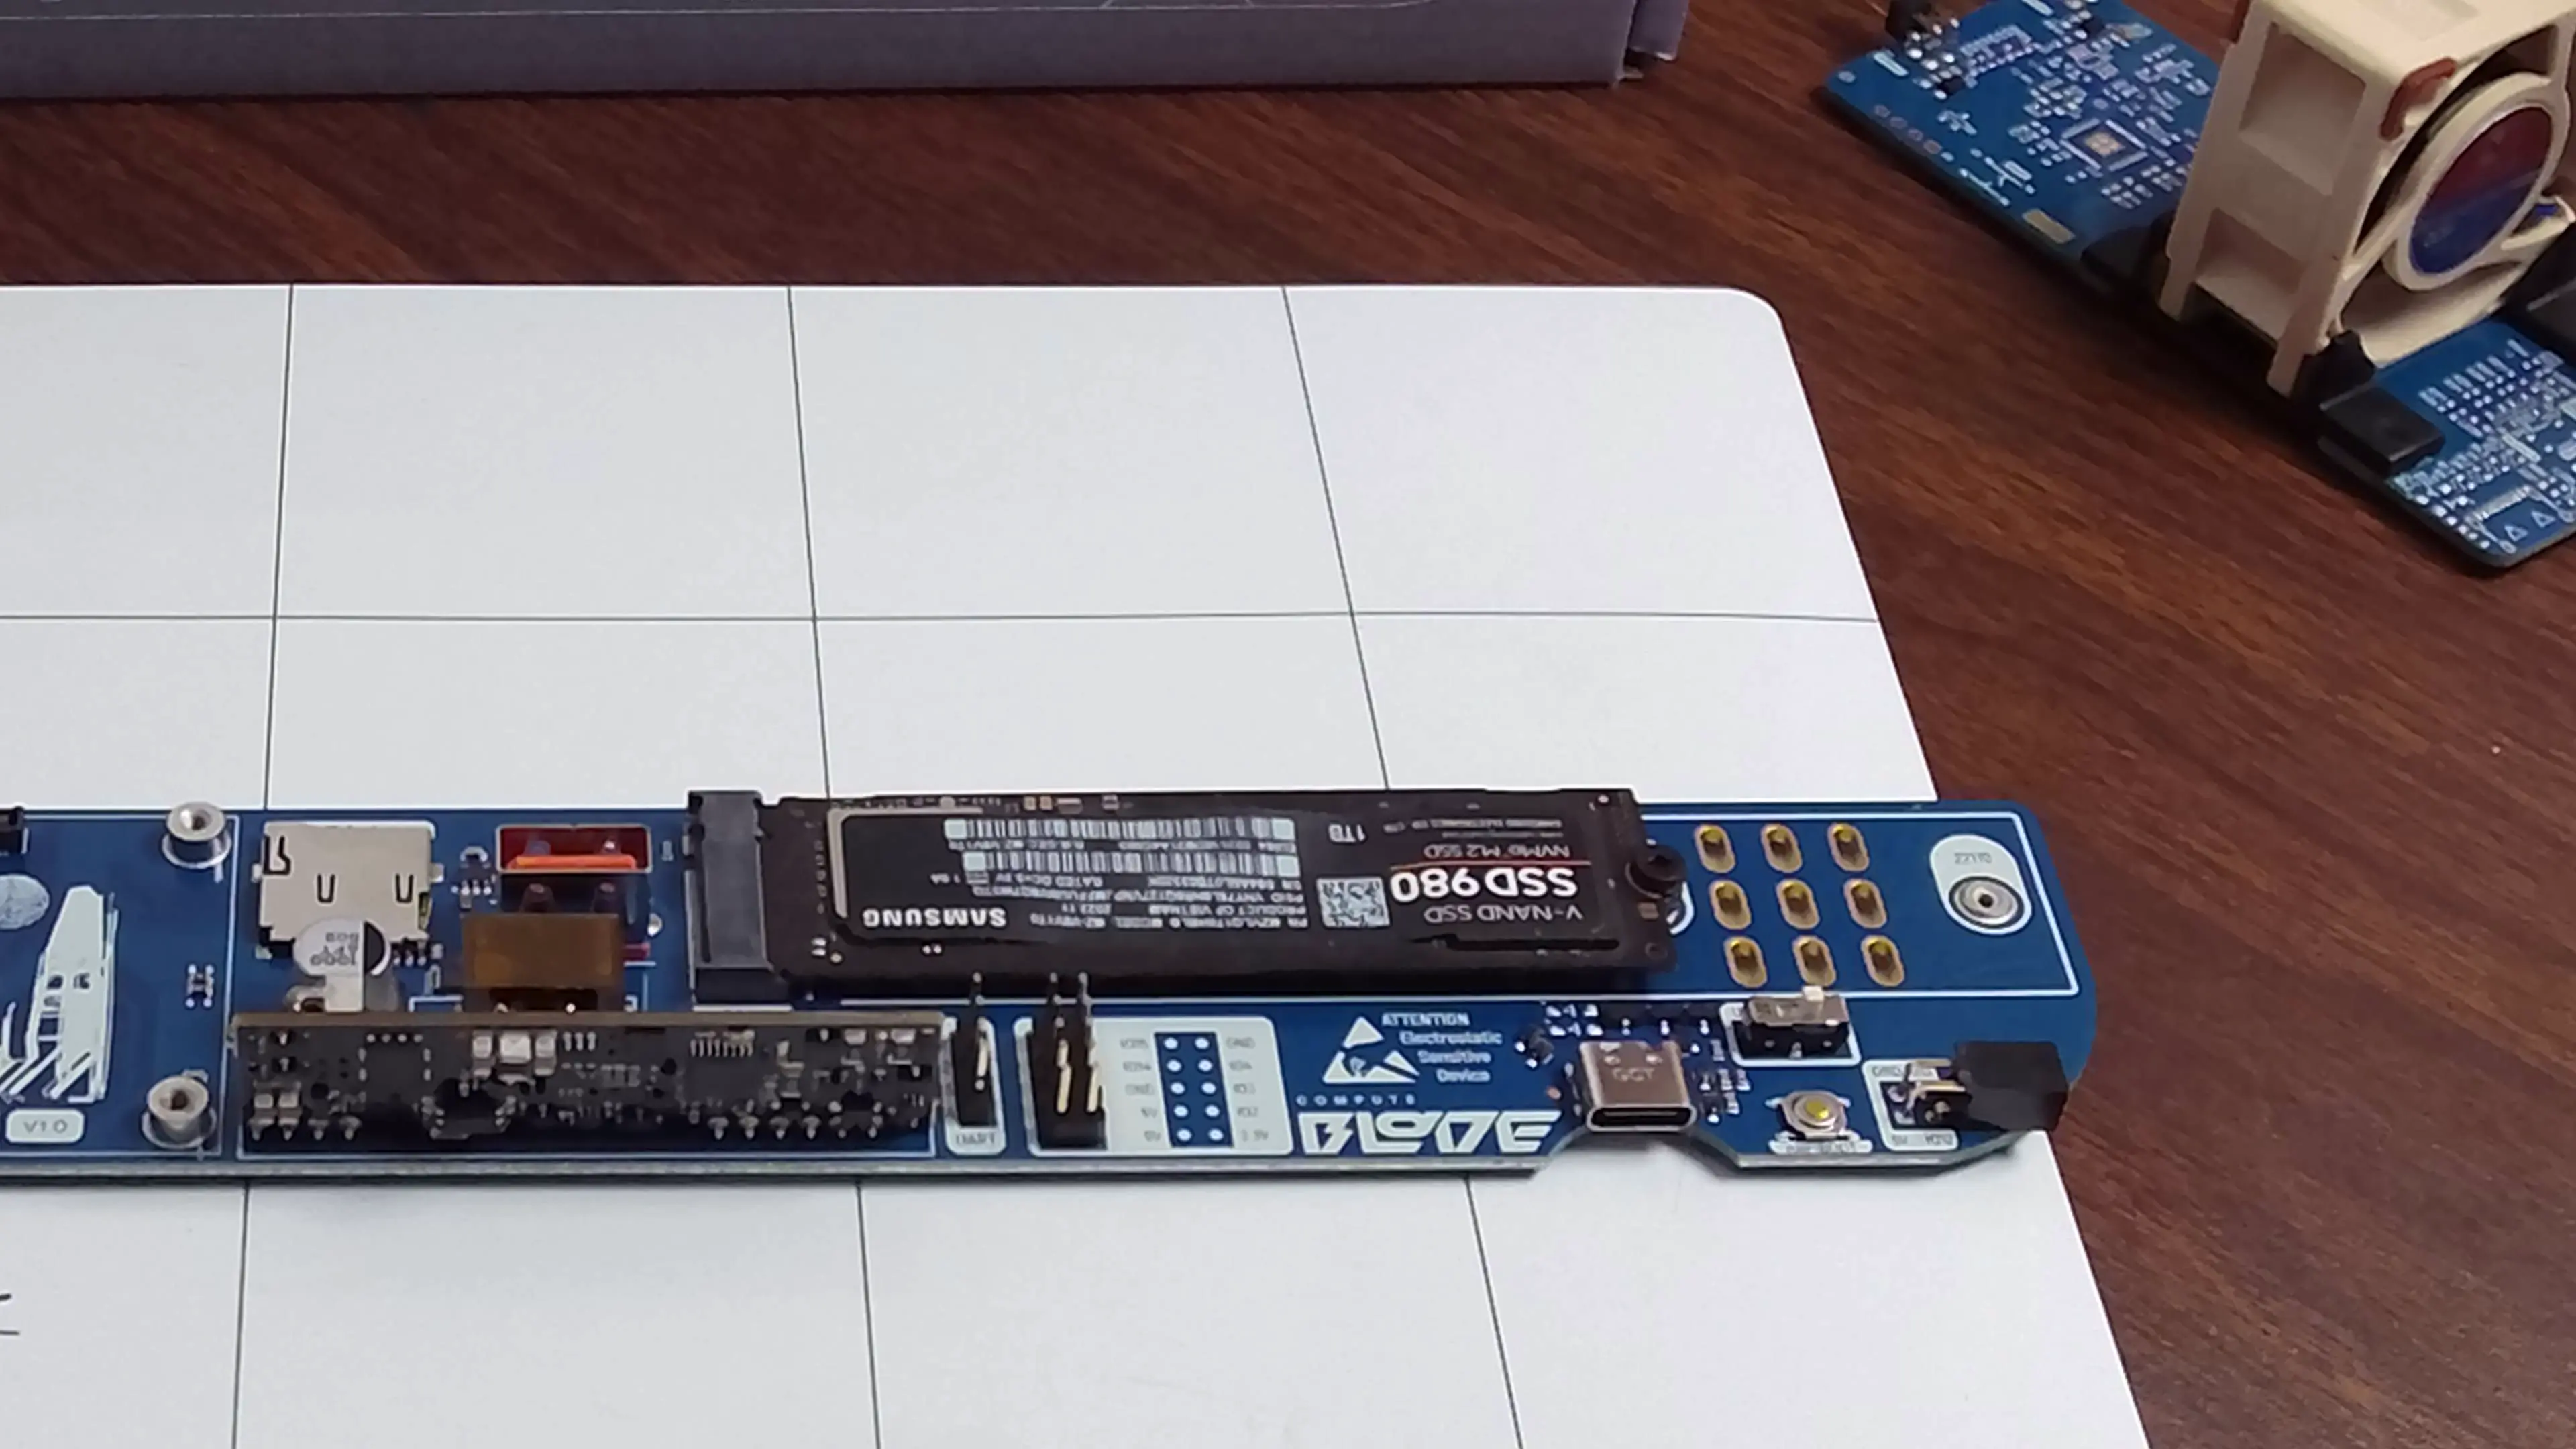
The M.2 device is now installed.
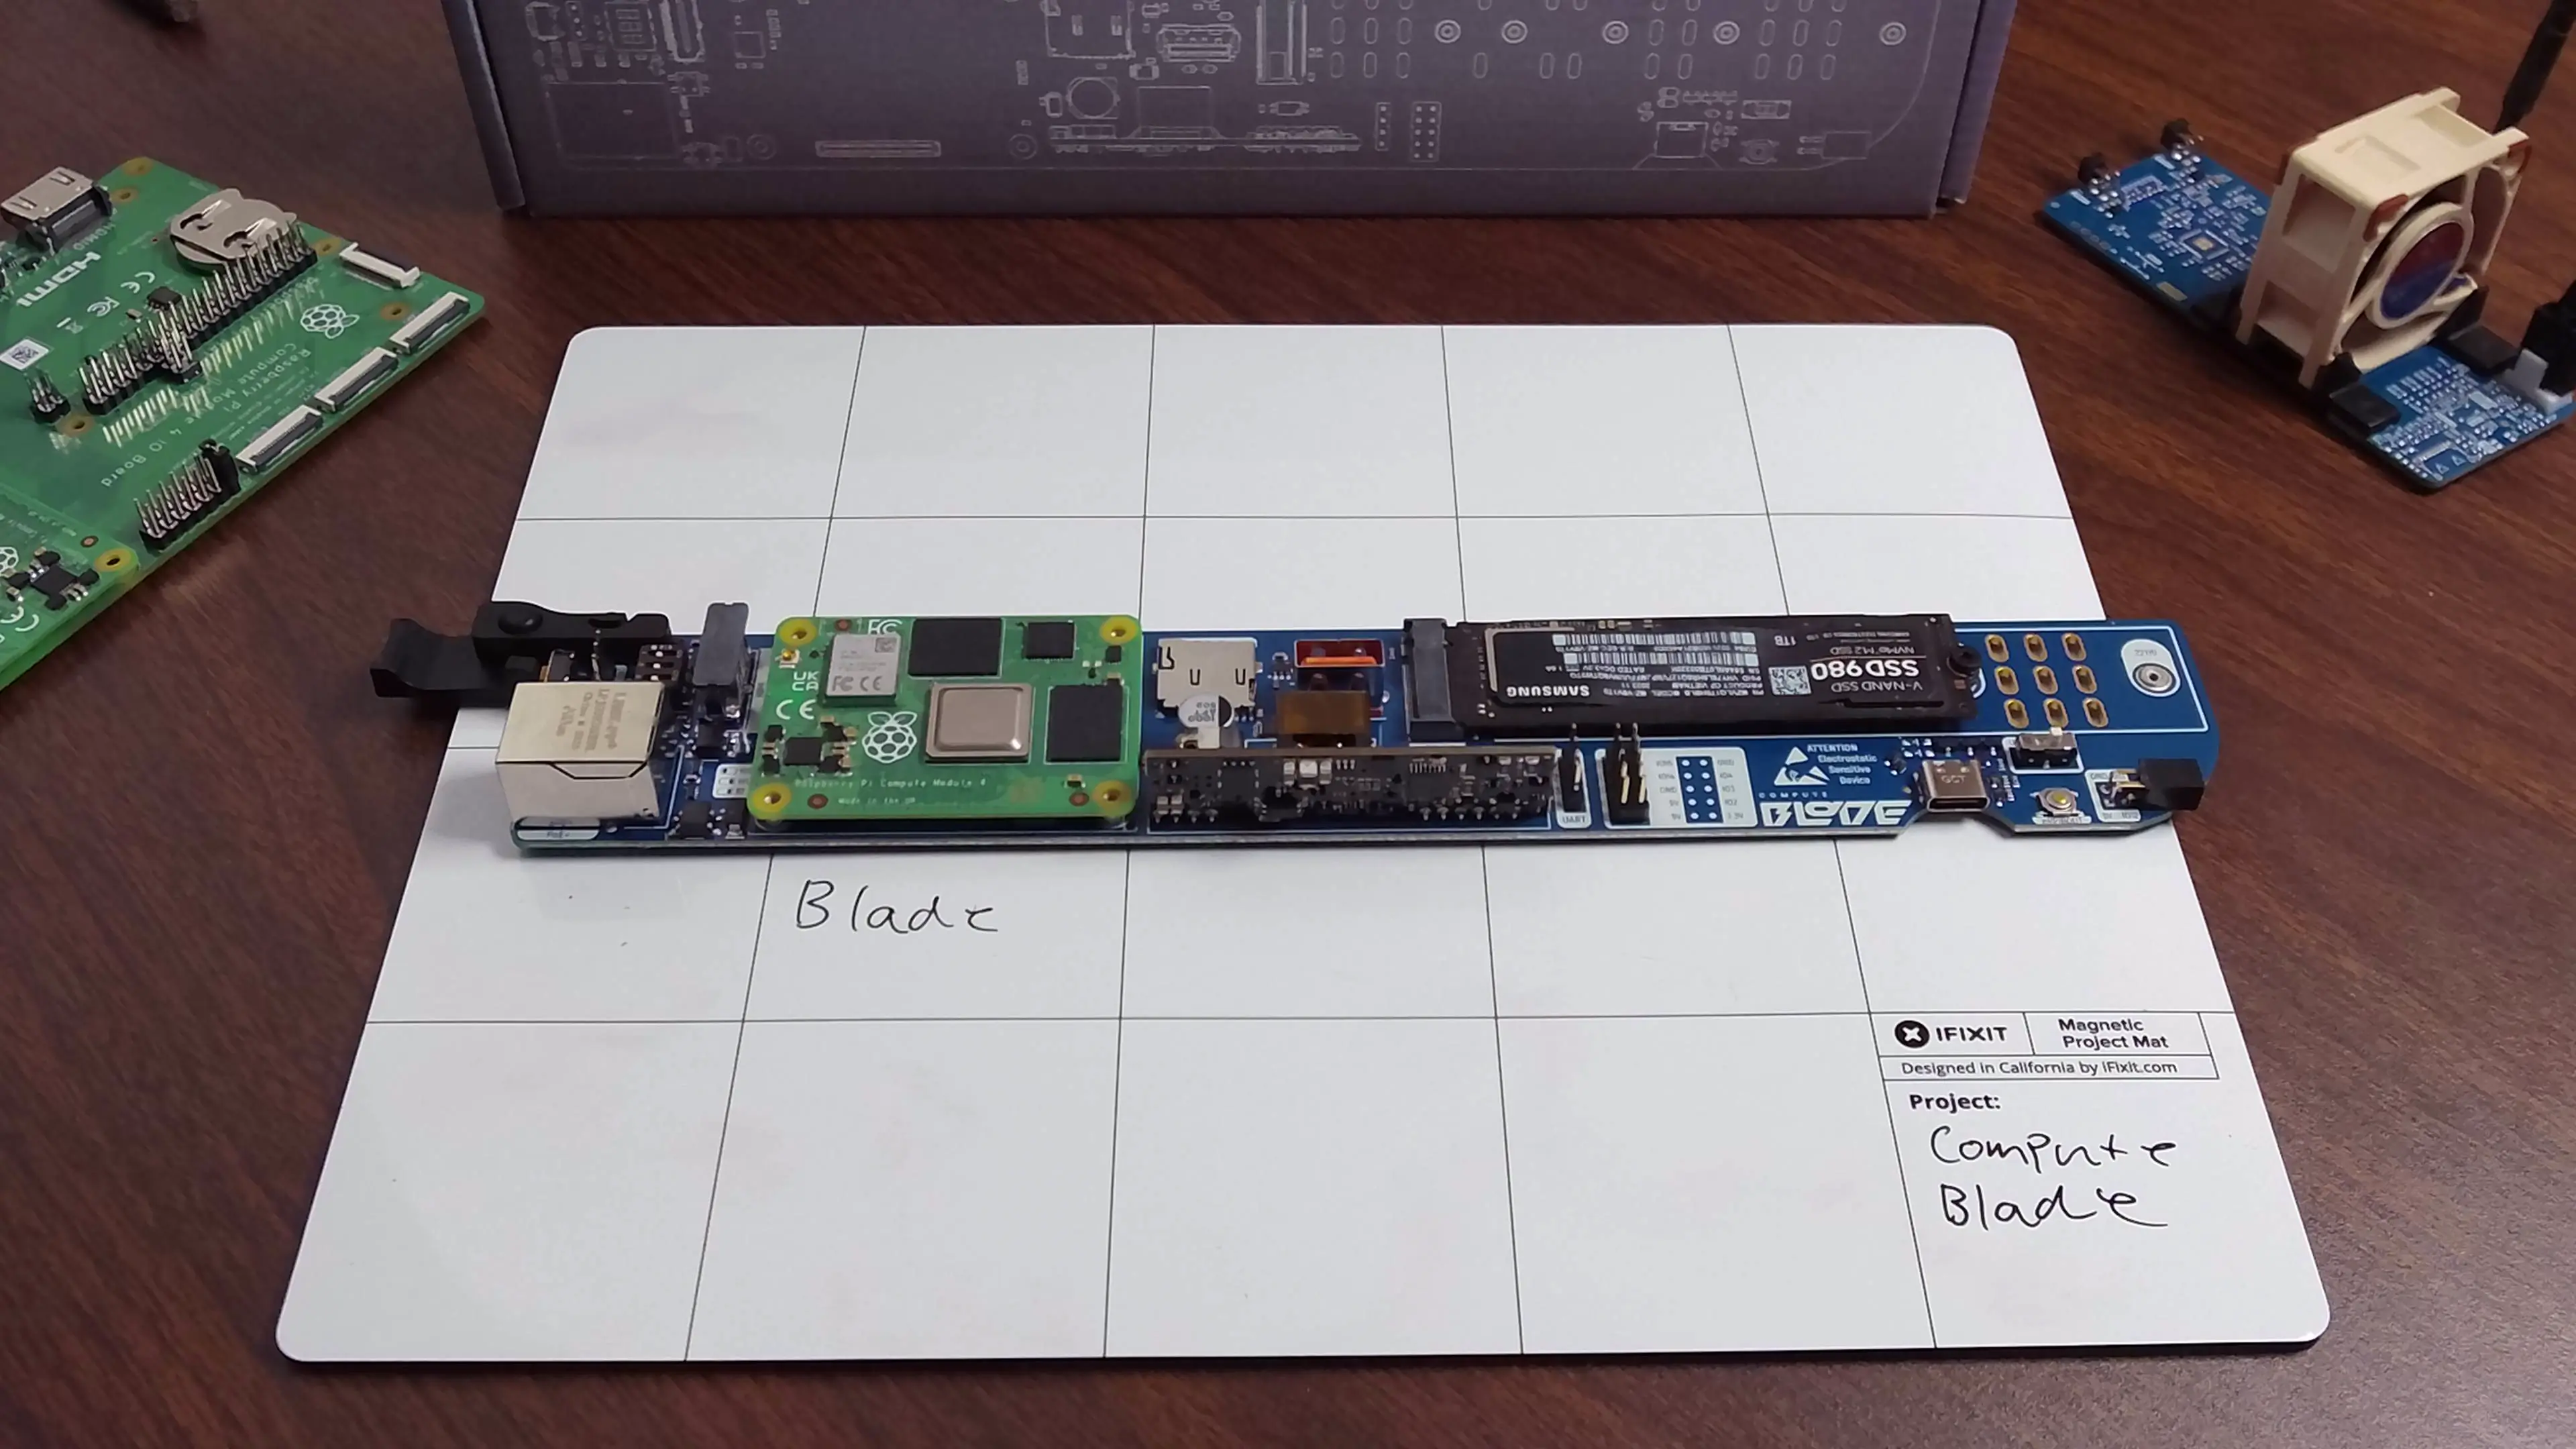
Compute Module
The Compute Blade is built for the Raspberry Pi Compute Module 4(CM4) and Compute Module 5(CM5).
The Compute Blade is made for the CM4 / CM5; other compute modules may NOT work as intended on the Compute Blade as they are not officially validated.
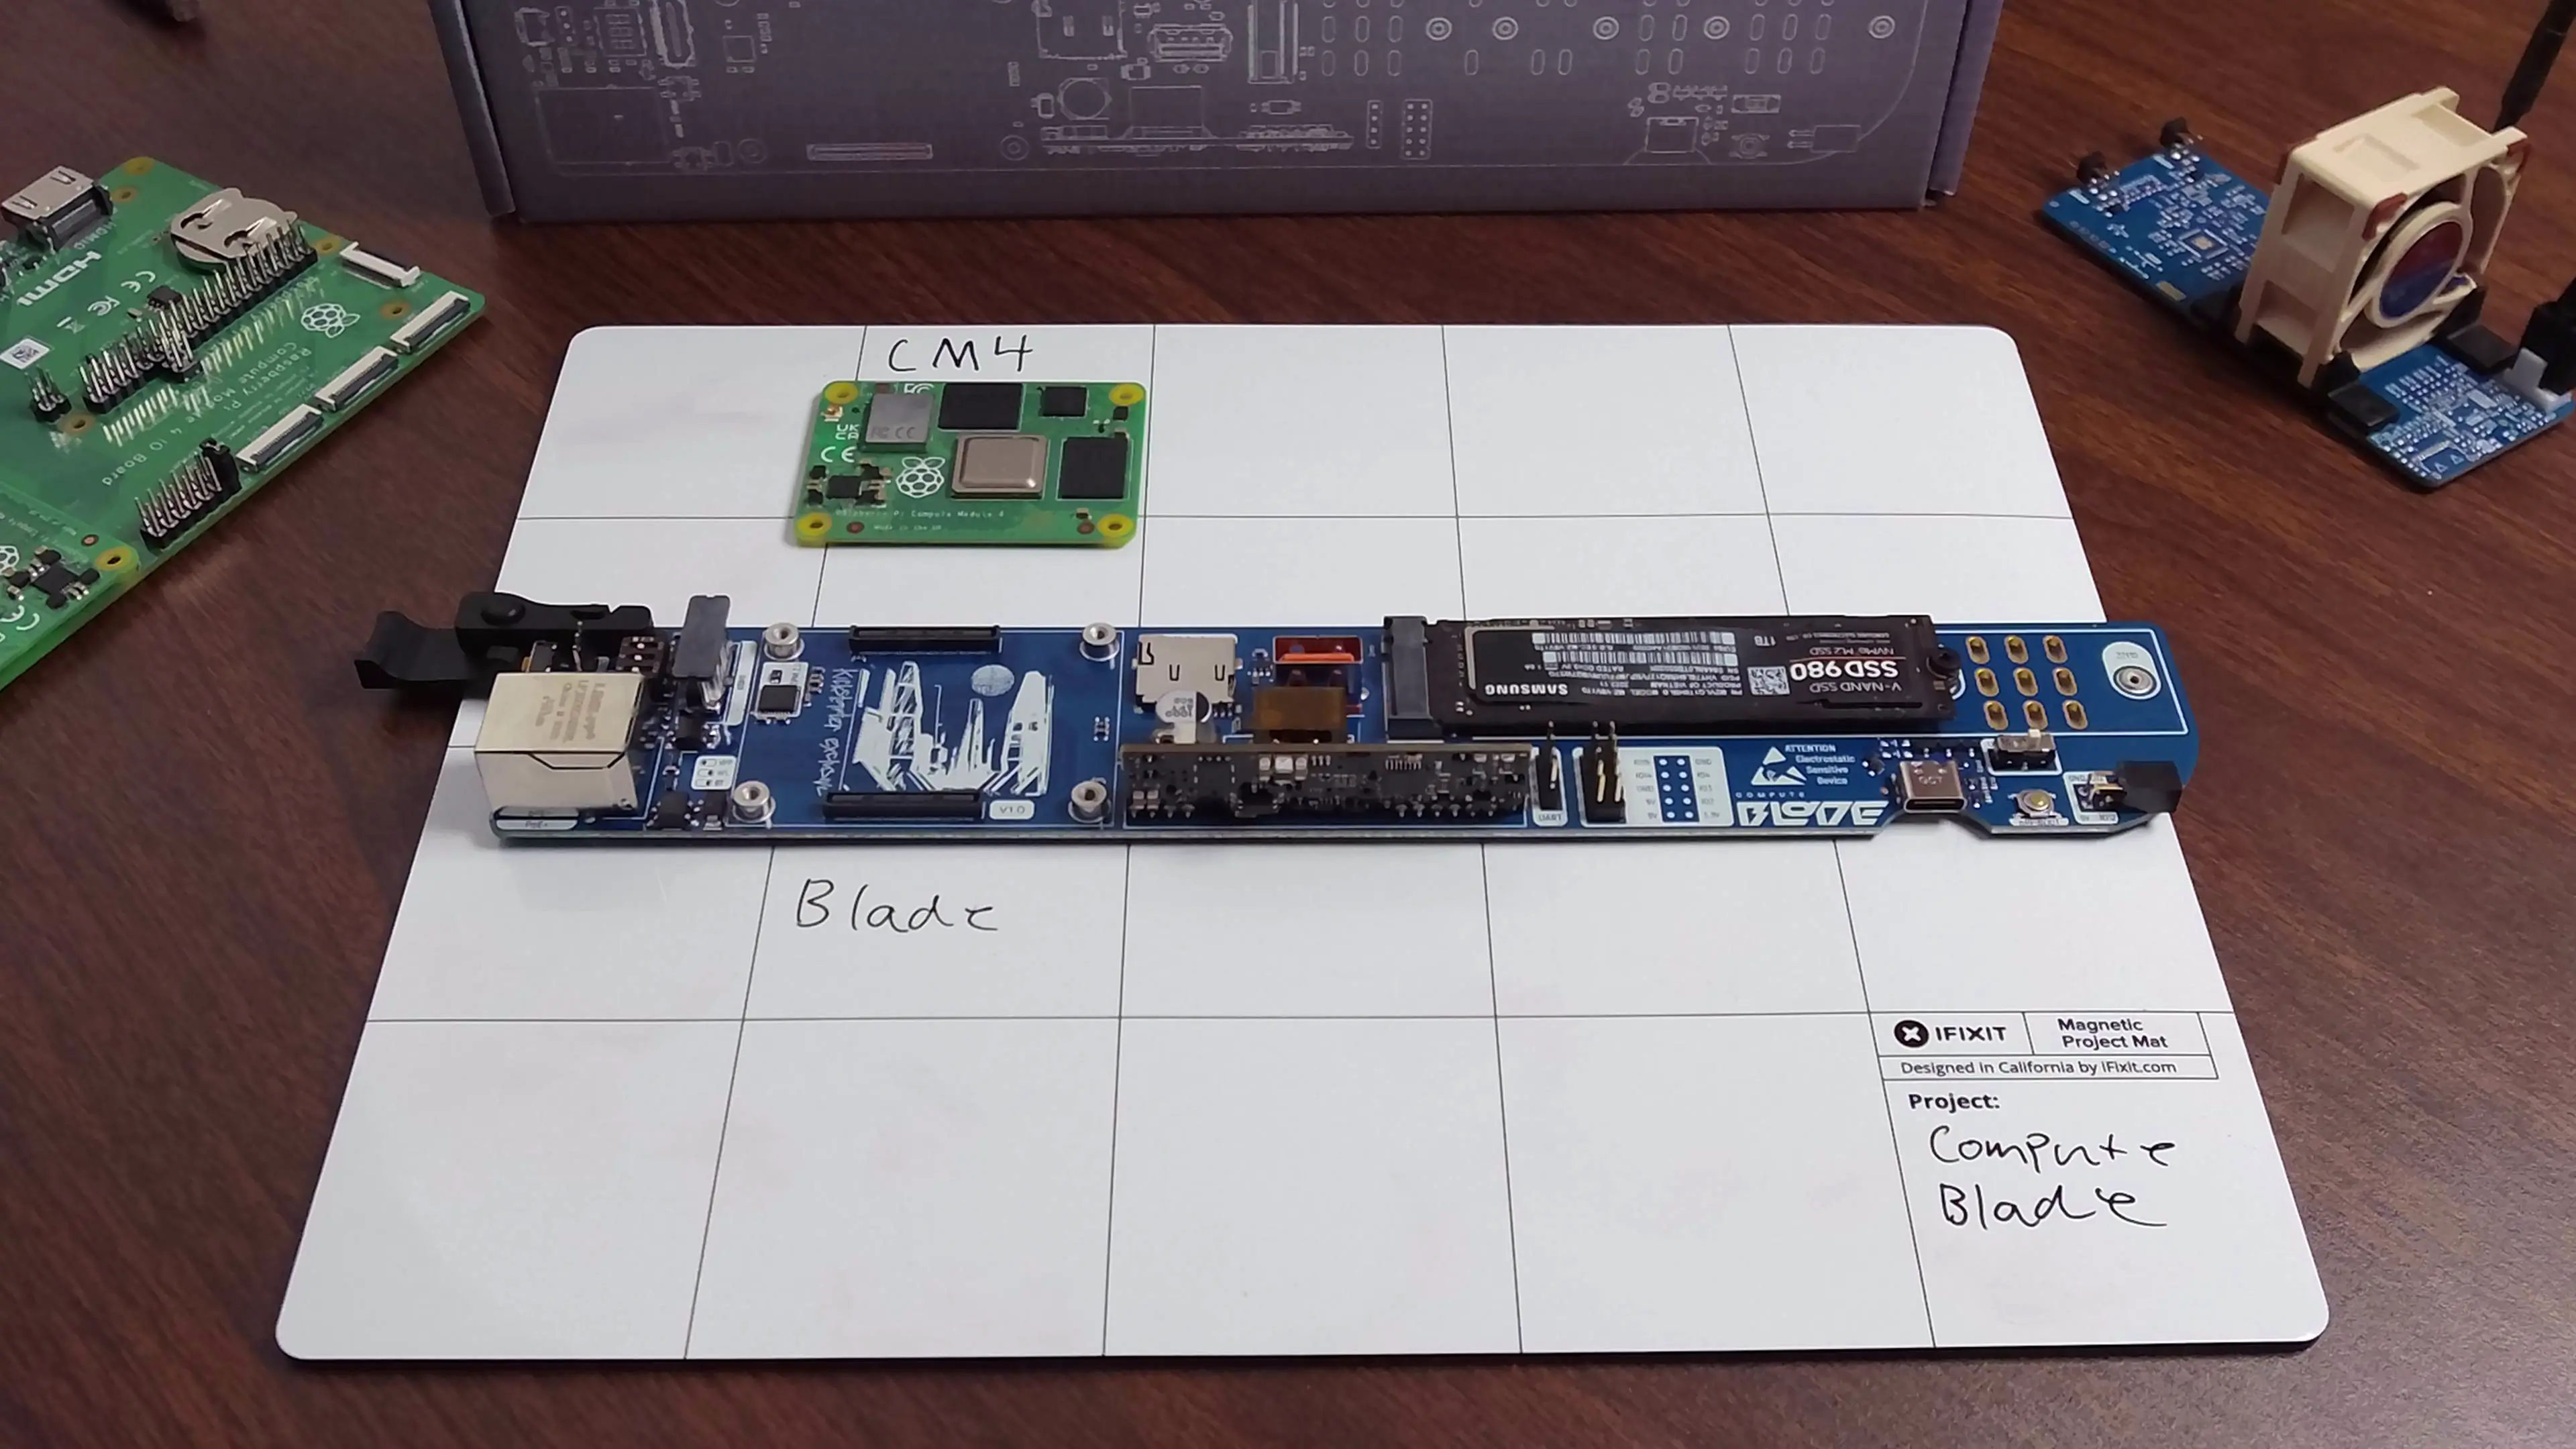
Align the compute module board to board connecter with the Compute Blade.
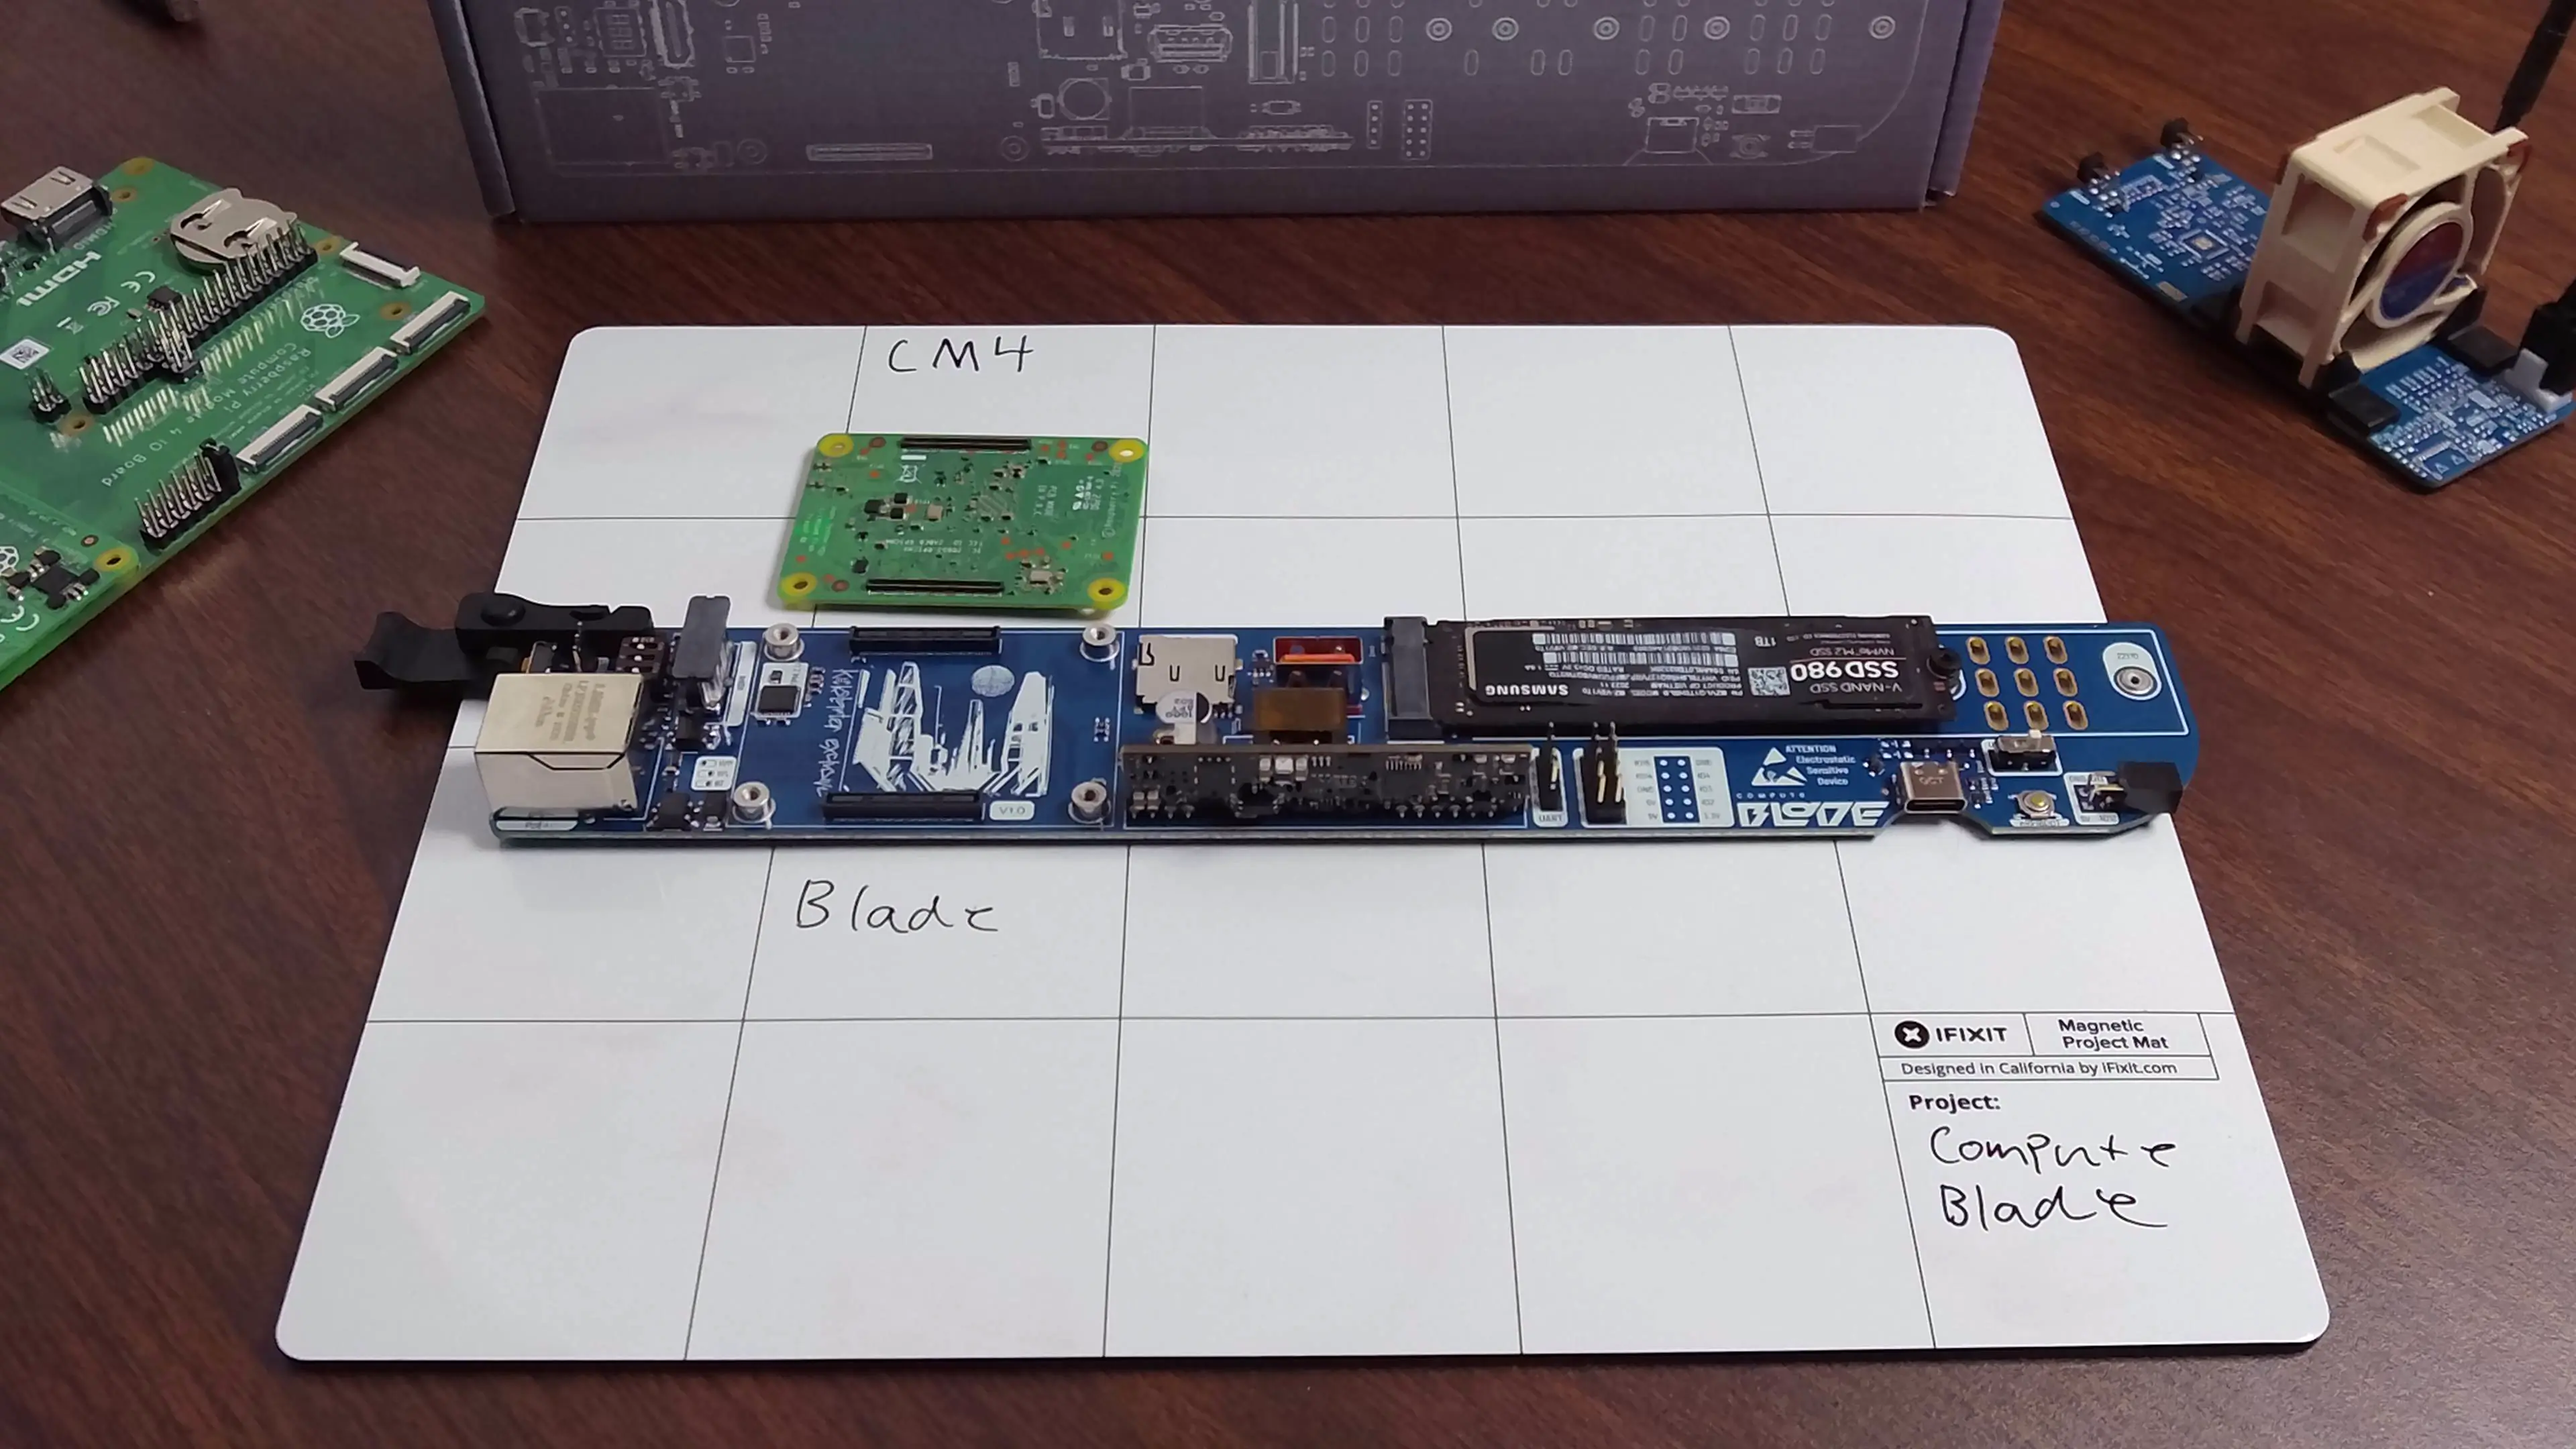
Place the compute module onto the connector and press firmly.
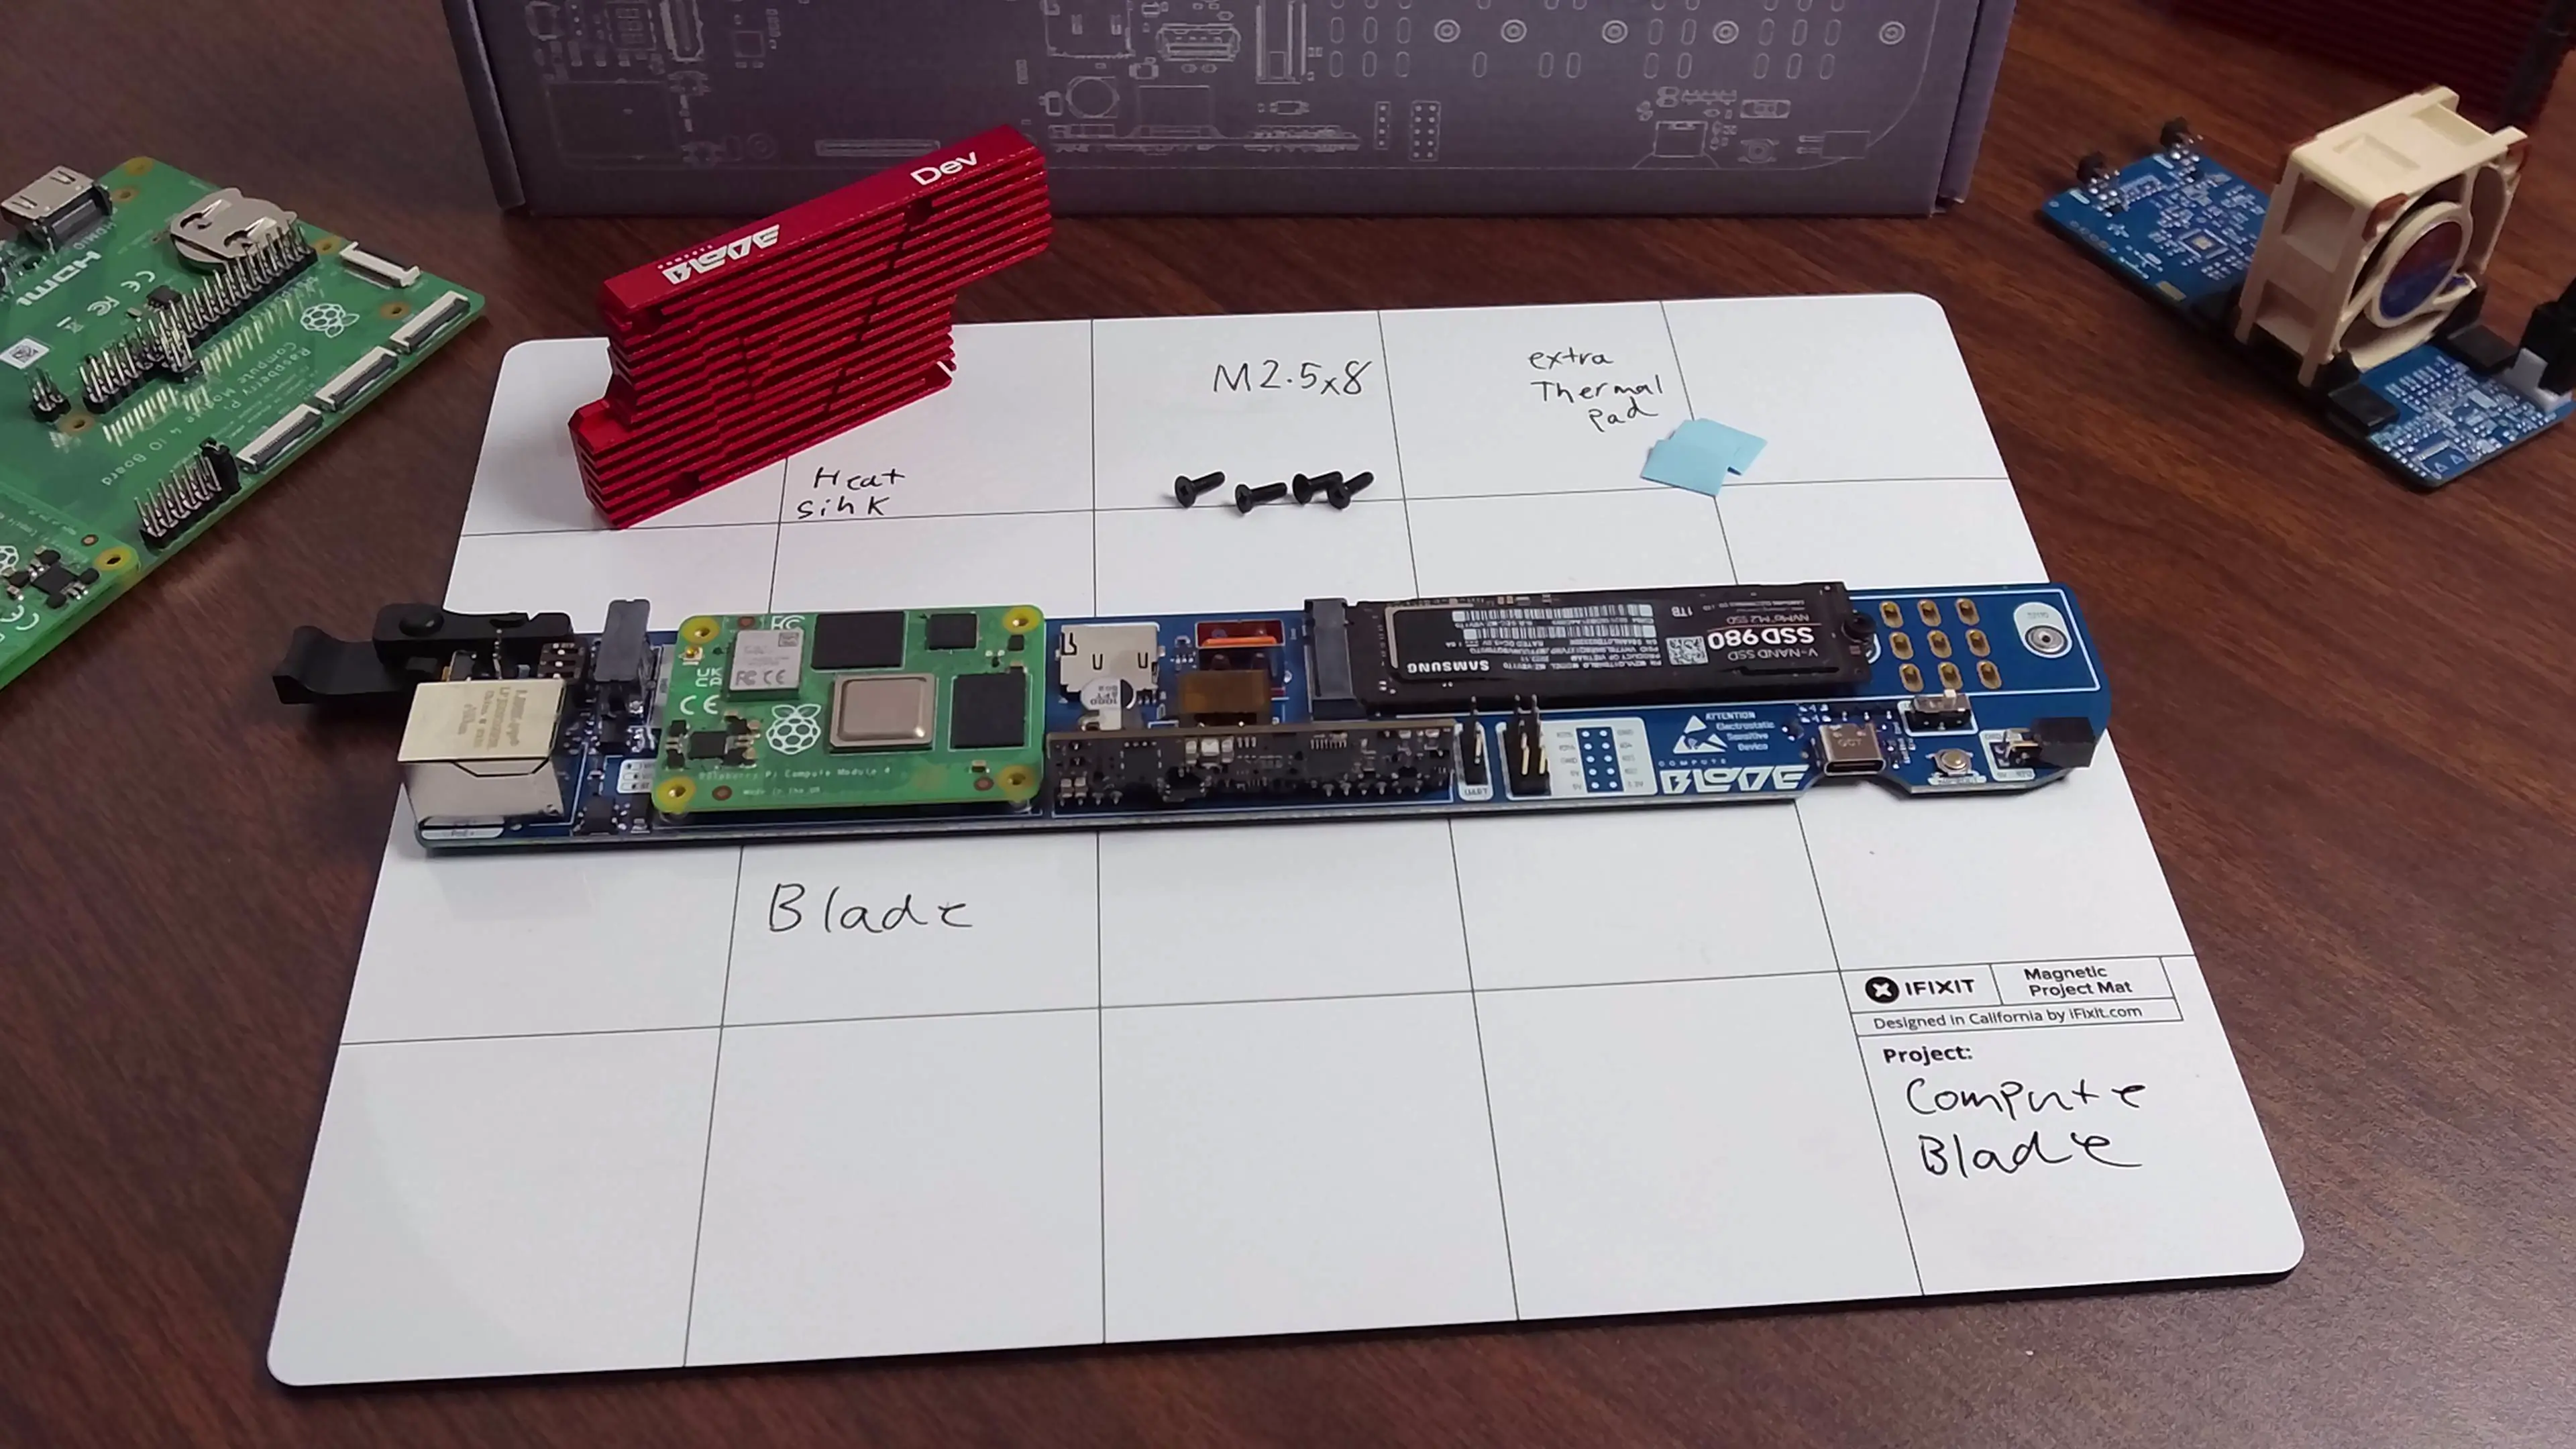
Heat Sink
A heat sink is recommend to get the most out of your CM4 and is required for CM5. The Compute Blade Heat Sink is built to give your Compute Blade the best performance.
Compute Bade Heatsink are currently not compatible with CM5
Included in the box
- Heat Sink
- x4 M2.5x8 Screws
- Extra Thermal Pads
To install the Heat Sink a Compute Module 4 must be installed first
Remove the plastic from the pre-applied thermal pads.
Place the heat sink on to the CM4. The text on the edge of the heat sink should be at the top of the blade. The Heat sink can now be secured with the four included M2.5x8 screws. Using a PH1 screw driver, tighten the screws to secure the heat sink.
Do not over tighten the screws. Over tightening will cause the Compute Module to bend.
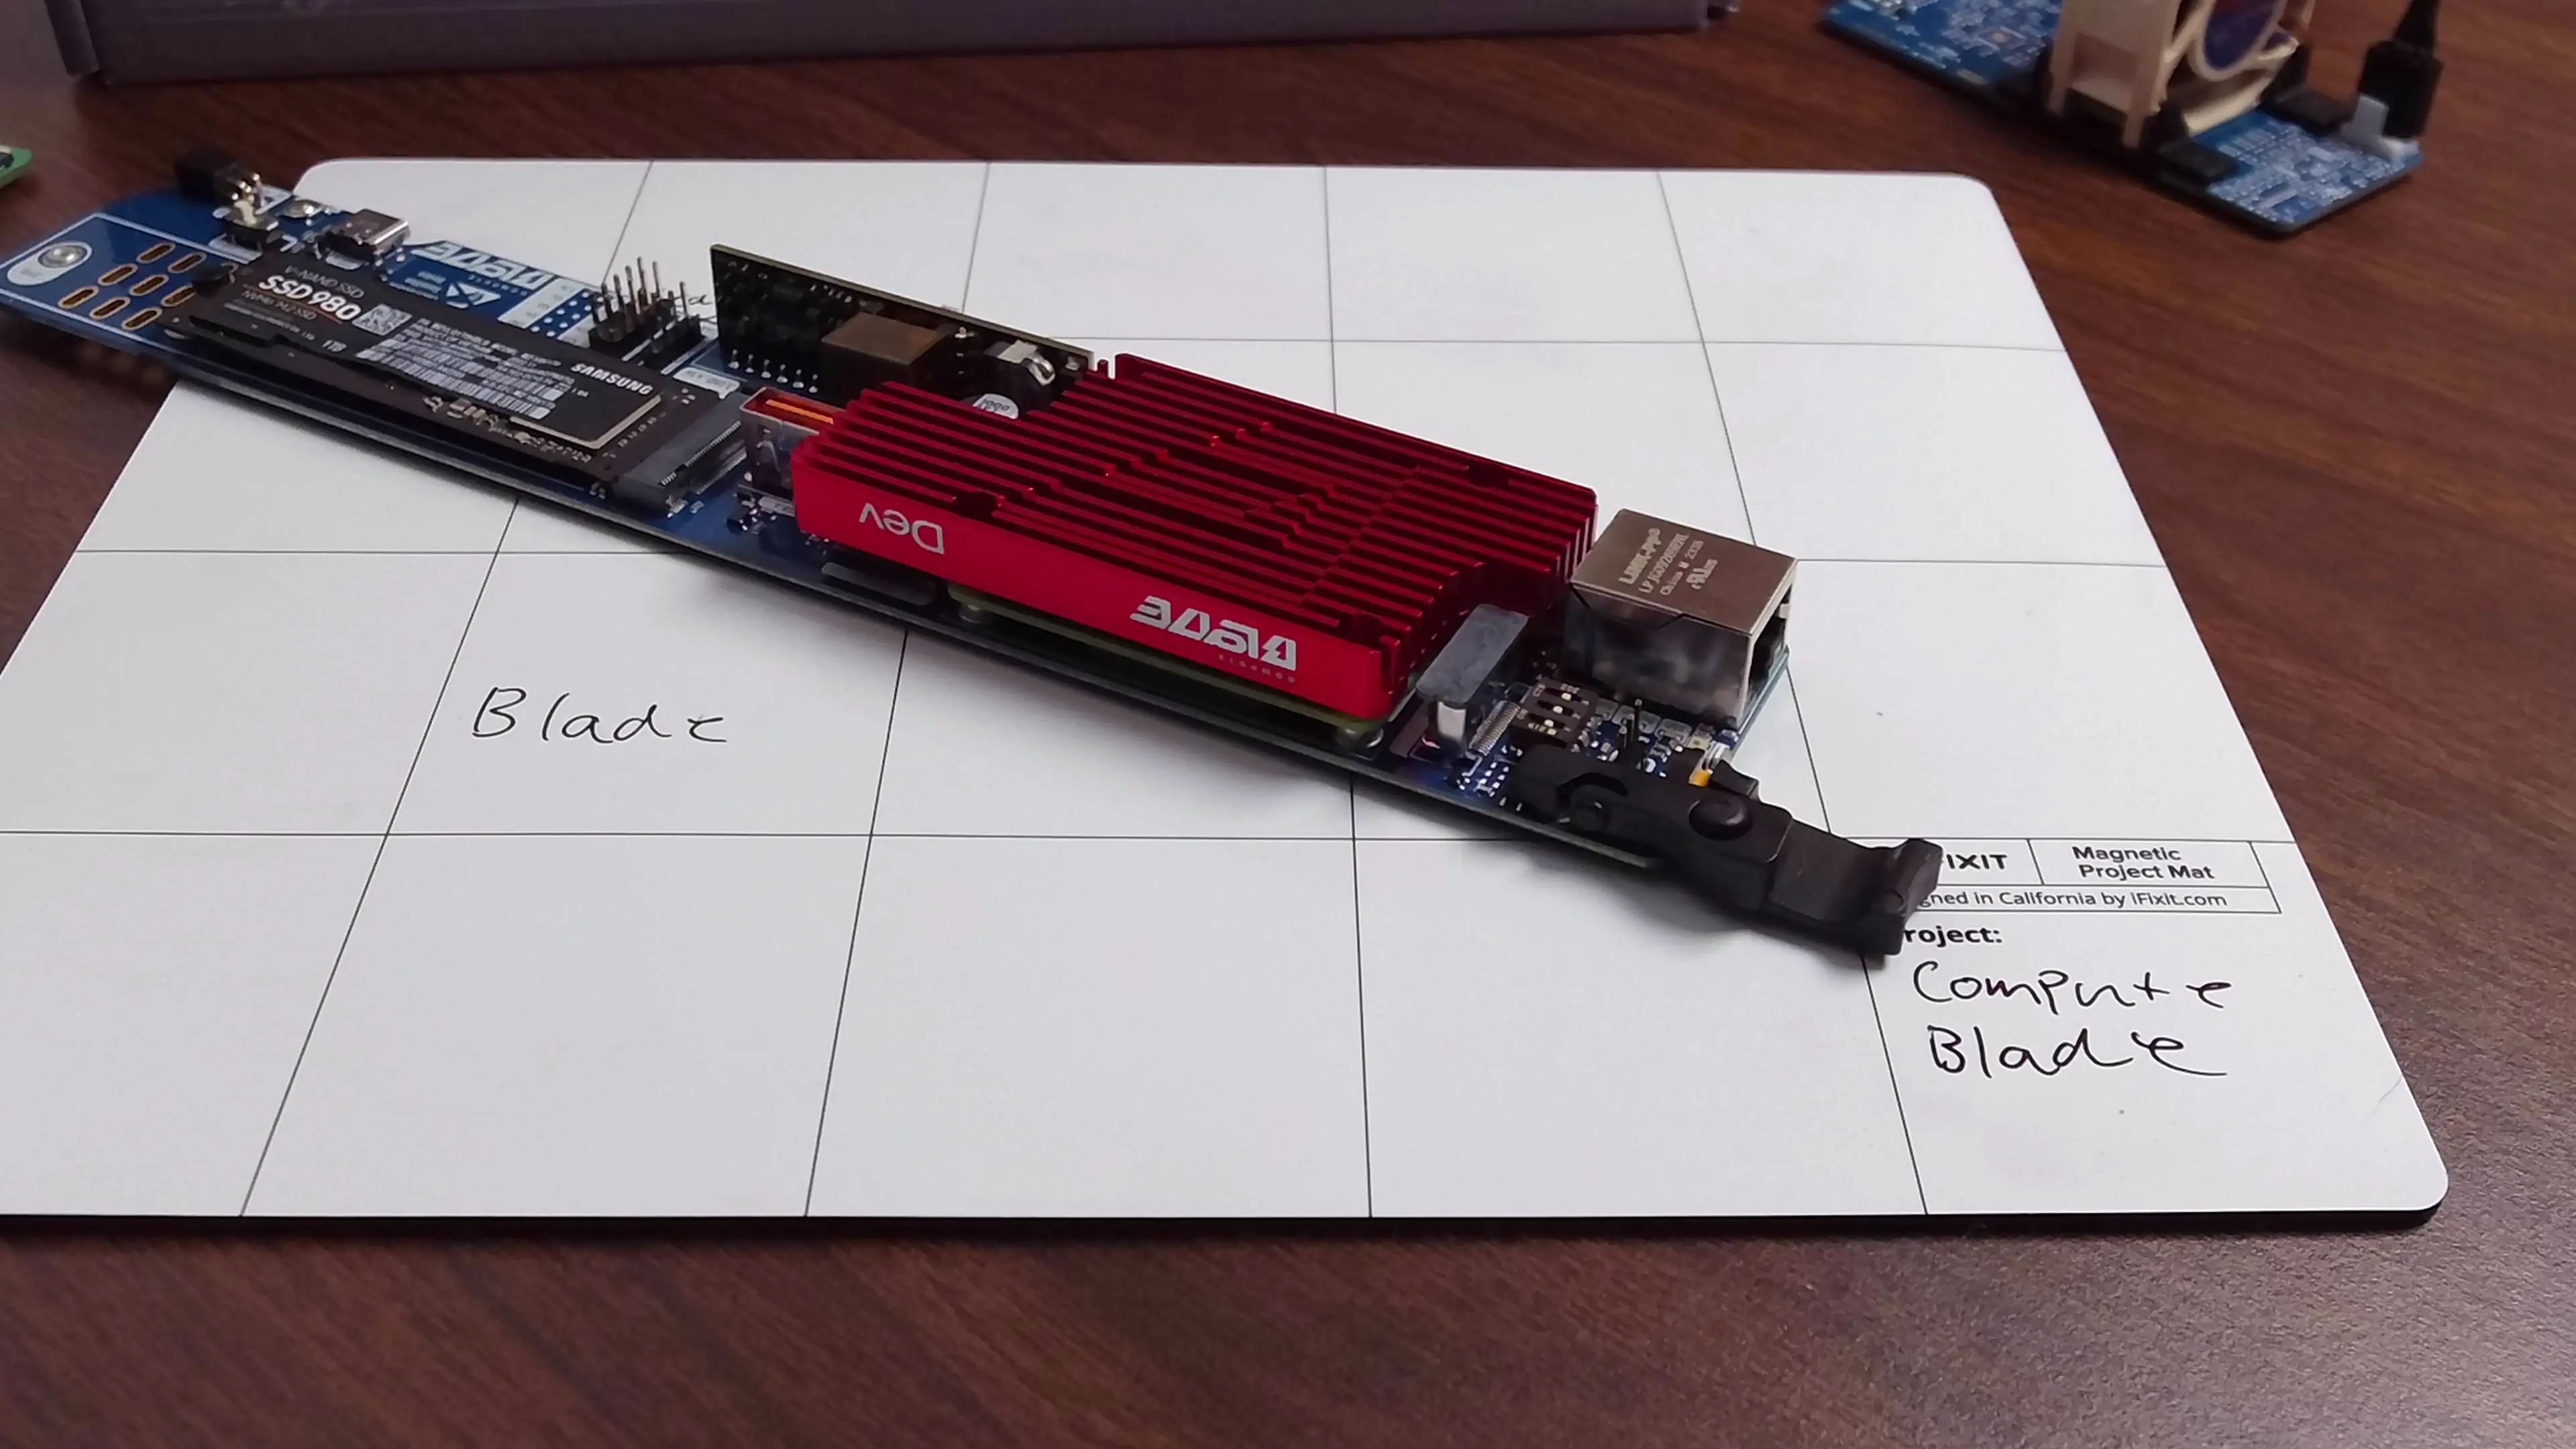
The Heat Sink is now fully installed.
Fan Unit
If you would like to assemble a fan unit see our fan unit instructions