Imaging Storage Media
You can boot the Raspberry Pi Compute Module 4 (CM4) and Compute Module 5 (CM5)in several ways on the Compute Blade
Pre-boot eXecution Environment(PXE) is a process to boot a computer over the network. It will not be covered here. See our dedicated guide for more information
Prepare Storage Media
To prepare a storage medium you will need another computer.
- microSD Card
- SSD
- eMMC
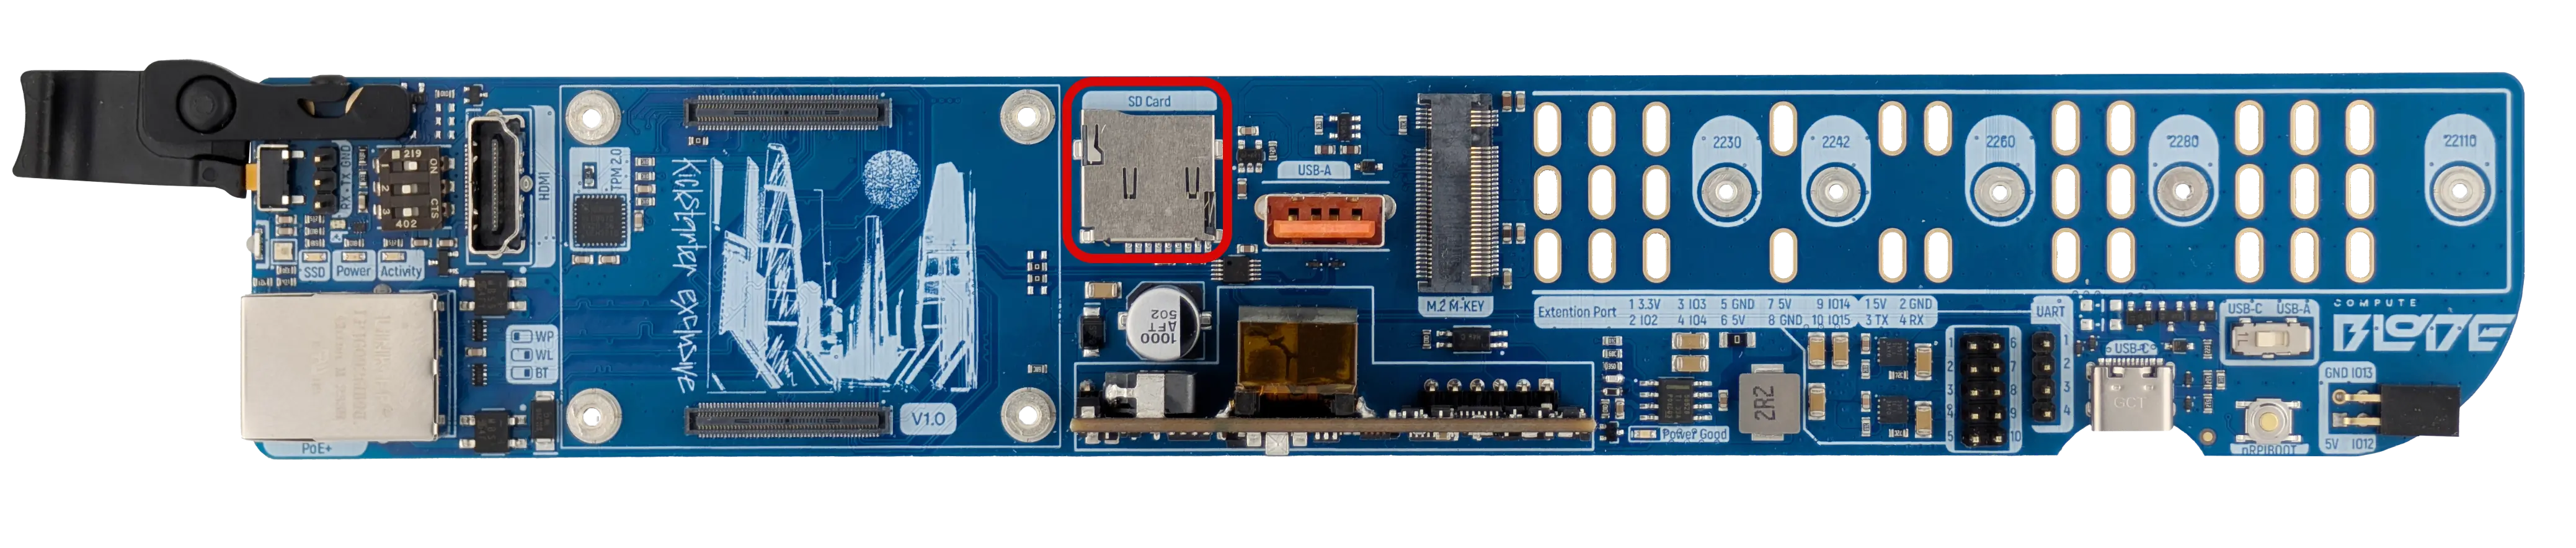
Only the Dev model Compute Blade has a microSD Card slot
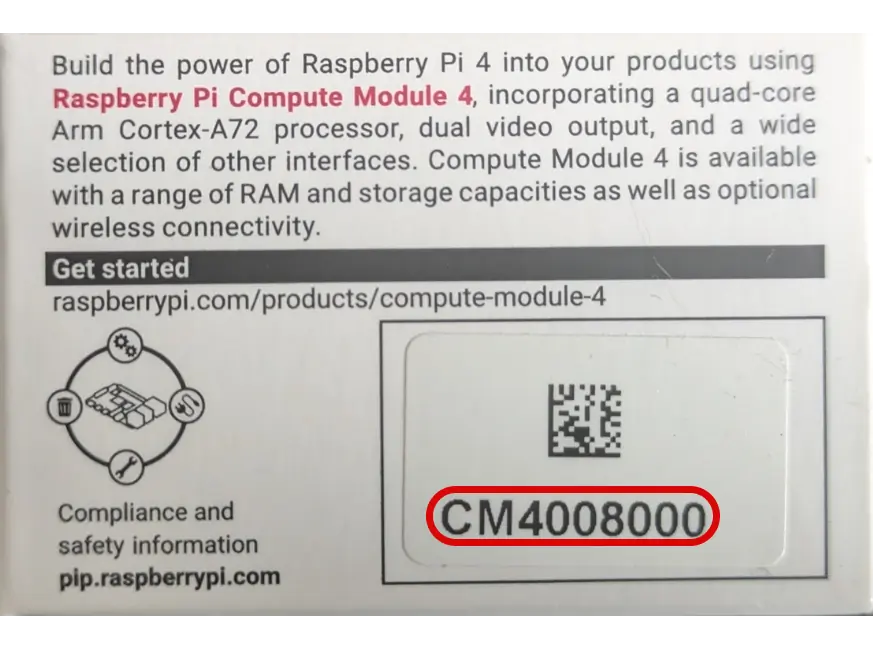
CM4s with part number CM4XXX000 must be used as others have eMMC and are unable to use MicroSD Card slot
The microSD Card needs to be at least 8GB. Your computer may not have a microSD Card slot and need an adapter.
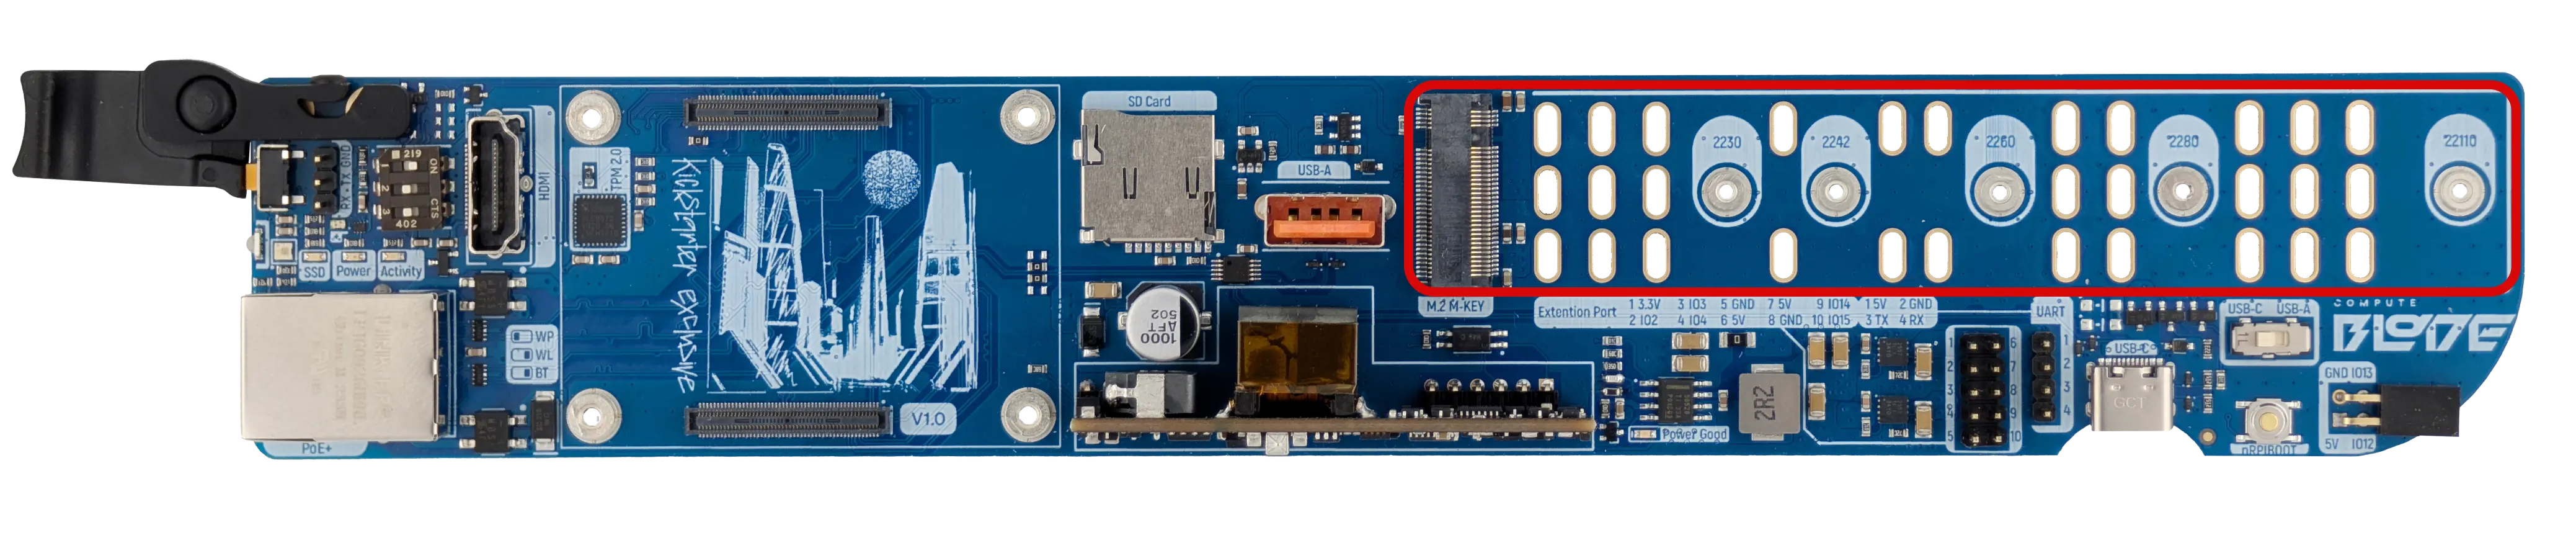
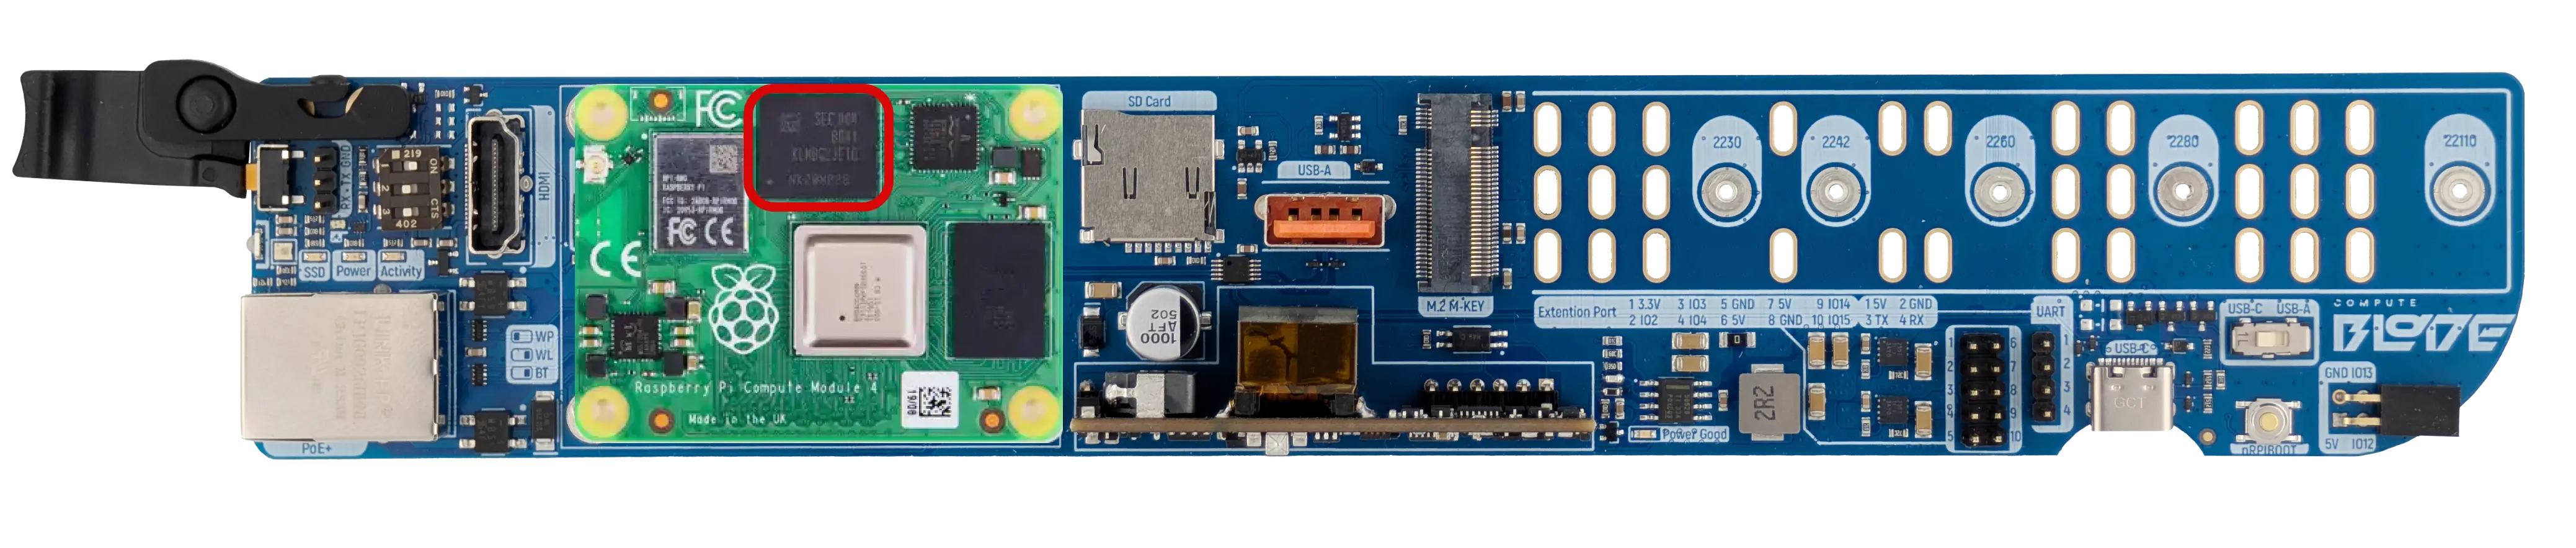
The Compute Blade supports M key and B+M key M.2 devices, from size 2230 to 22110
The Compute Blade has a M.2 M key which supports both SATA and NVMe Solid State Drives(SSD). The M.2 SSD can be imaged the same as the microSD card but requires a USB to M.2 NVME/SATA Adapter, such as the UGREEN M.2 NVMe SSD Enclosure Adapter.
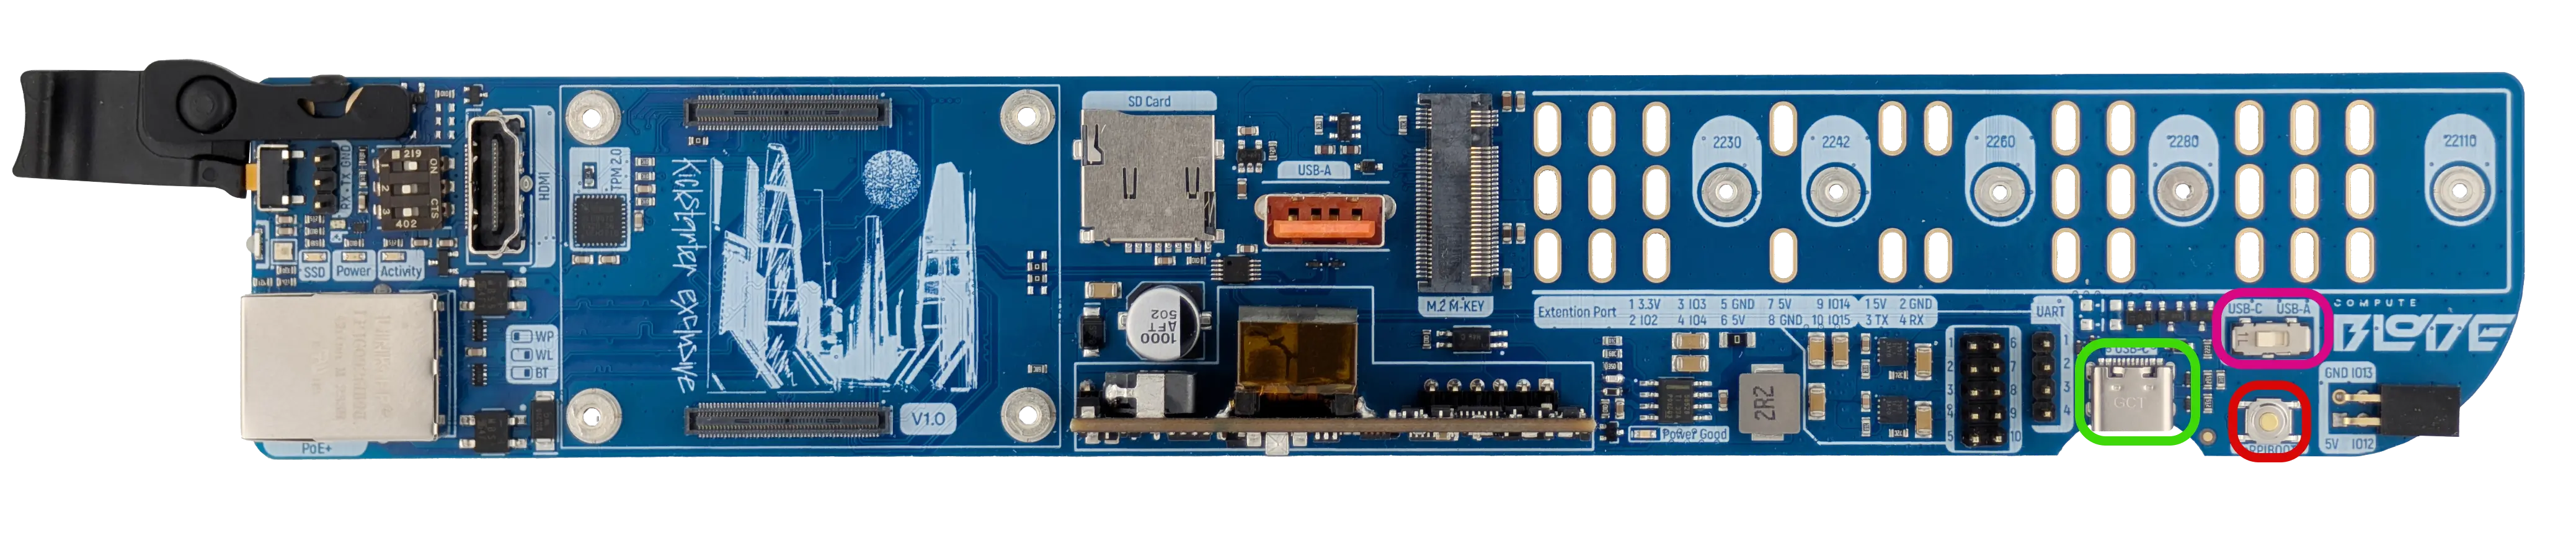
eMMC can only be imaged on Dev blade as it has USB Type-C port, USB switch, and nRPIBOOT button
CM4s with part number CM4XXX000 do NOT have eMMC and are referred to as lite.
Install usbboot From the usbboot directory run
sudo ./rpiboot
Move the USB switch to the USB Type-C position.
Then, while holding down the nRPIBOOT button on the blade connect the USB Type-C cable.
The Device will reconnect several times. On the last time it will appear as a USB media device.
Download and install Raspberry Pi Imager. After installing run it. This software will be used to image the storage media.

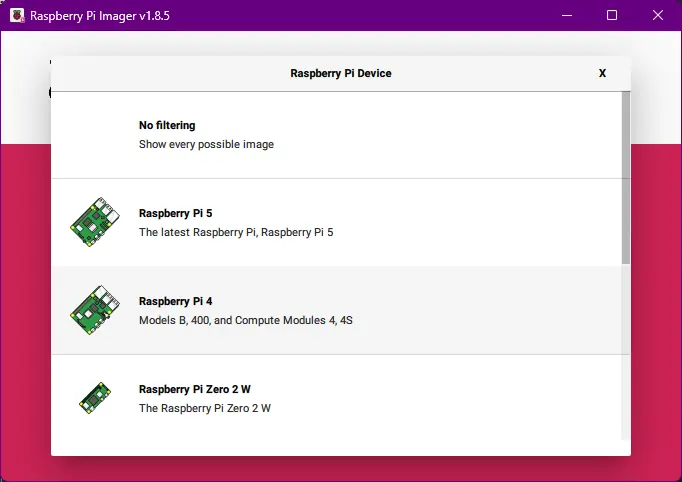
Select Raspberry Pi 4
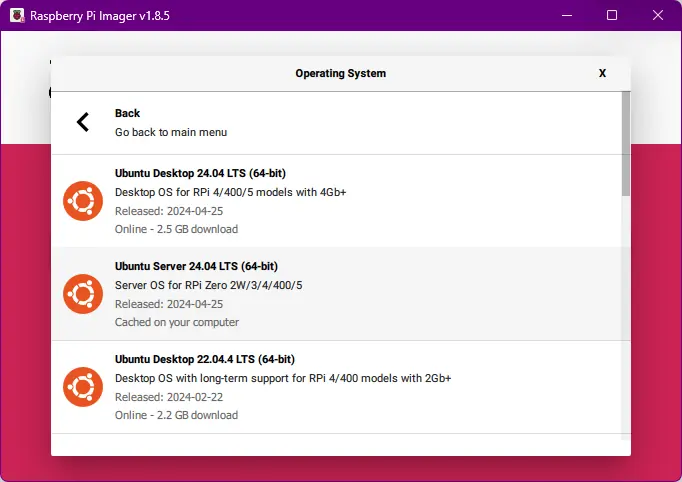
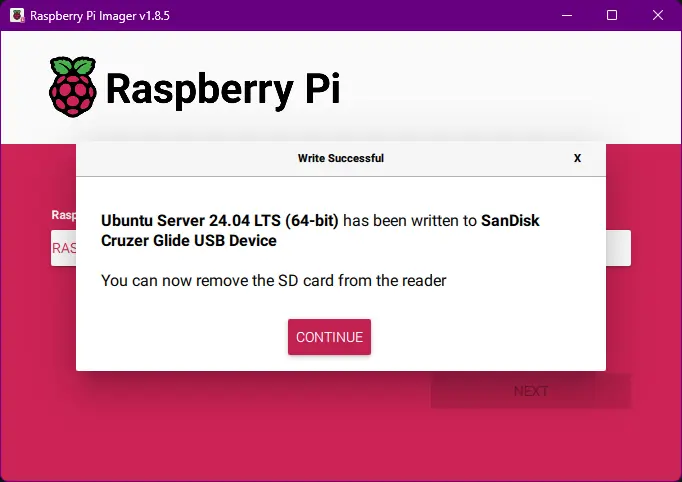
Select an operating system. We recommend Ubuntu Server 24.04 LTS (64-bit) Operating System > Other general-purpose OS > Ubuntu > Ubuntu Server 24.04 LTS (64-bit)
Select storage media

Click the NEXT then click the EDIT SETTINGS button. Two settings need to be edited.
GENERAL > Set hostname- This name will be used to connect to your blade laterGENERAL > Set username and password- Use your own username and passwordGENERAL > Set locale setting(Optional) - Set the blade locale setting
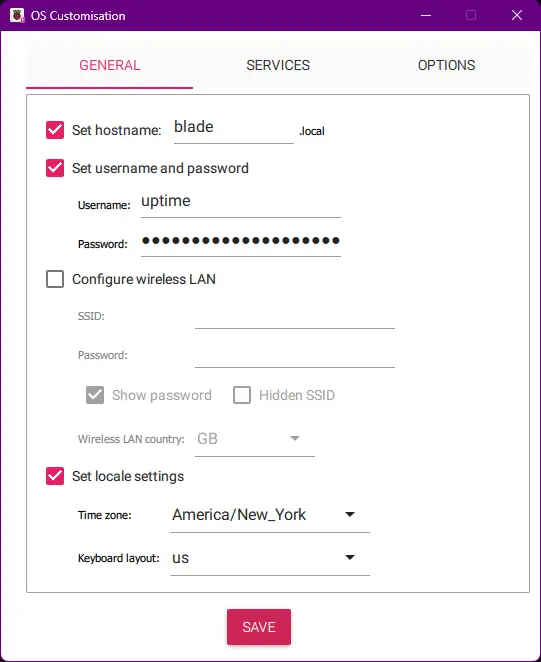
SERVICES > Enable SSH - Use password authentication
Allow public-key authentication only is the more secure option, but is more complex to set up. Read more in our SSH guide

Then click SAVE
Finally click YES and confirm that all existing data on the storage device will be erased by clicking YES again.
Raspberry Pi Imager will begin to write the OS to the storage device.
Once completed remove the storage device from the computer.
Install Storage Media in Blade
- microSD Card
- SSD
- eMMC
Only the Dev model Compute Blade has a microSD Card Slot.
Next to the top right corner of the CM4 you will find the microSD card slot. Insert the card with the pins facing down.
see Assembly section for installation images
- Remove the Kapton tape from the standoff mount (If this has not already been done)
- Using a 5mm hex driver, attach the standoff to the the location corresponding to your drives size
- Insert the M.2 SSD at a 30° angle and press down
- Place the M2 nylon washer on the M2x2.5 screw and install using a PH1 driver to retain the M.2 SSD
Unplug the USB Type-C cable from the Compute Blade and set the switch to USB-A
Your Blade is now ready to be powered on.