Setting Up Docker Compose and Plex on ComputeBlade
A step-by-step guide to setting up a Plex media server using Docker Compose and Portainer on ComputeBlade hardware. This tutorial covers installation, configuration, and deployment of your personal streaming service.

Having your own media server gives you complete control over your content library, ensuring your favorite movies and shows are always available regardless of changing streaming service licenses.
In this tutorial, we'll set up a Plex media server that allows you to:
- Stream your personal media collection (movies, TV shows, music) to any device
- Organize your content with automatic metadata fetching and beautiful library management
- Transcode media on-the-fly for optimal playback on different devices
- Share your library with family members with customizable access controls
The setup will use Docker containers for easy deployment and management, with Portainer providing a user-friendly interface for container administration. All media files will be stored locally on your ComputeBlade, ensuring fast access and complete control over your content.
This guide assumes you will only use legally obtained content in your Plex library. Always respect copyright laws and purchase or license your media. Plex Copyright Policy
Compute Blade and Plex Server

ComputeBlade offers several advantages that make it particularly well-suited for hosting a Plex media server. The architecture provides excellent performance for media transcoding and streaming, ensuring smooth playback across multiple devices. Thanks to its energy-efficient design, running a 24/7 media server remains cost-effective from a power consumption standpoint.
The space-saving design allows you to build a powerful media server without requiring significant physical space, making it perfect for home setups. As your media library grows, ComputeBlade's modular nature allows you to easily expand storage and processing capabilities to meet your needs.
Additionally, the built-in high-speed networking ensures fast data transfer rates, which is crucial for streaming high-quality content to multiple devices simultaneously. This makes ComputeBlade an ideal choice for users looking to build a reliable and scalable media server solution.
Docked Standalone
This is part 3 of the series. This guide will assume the previous tutorials:
Docker standalone refers to running Docker directly on a single machine, as opposed to running it in a cluster or swarm configuration. This setup is simpler to manage and ideal for personal projects or smaller deployments where high availability and load balancing aren't critical requirements.
For our Plex media server setup, standalone Docker provides all the functionality we need while keeping the system architecture straightforward and manageable.
Follow these steps to install Docker on your ComputeBlade system:
Install Docker on ComputeBlade
Installation via automatic scripts.
curl -fsSL <https://get.docker.com> -o get-docker.sh
sudo sh get-docker.sh
Add User
Add user to the docker group, and restart session after.
sudo usermod -aG docker $USER
su - $USER
Install Portainer Agent on Docker
Go to Environment section and start Quick Wizard by selecting the Docker Standalone tile.
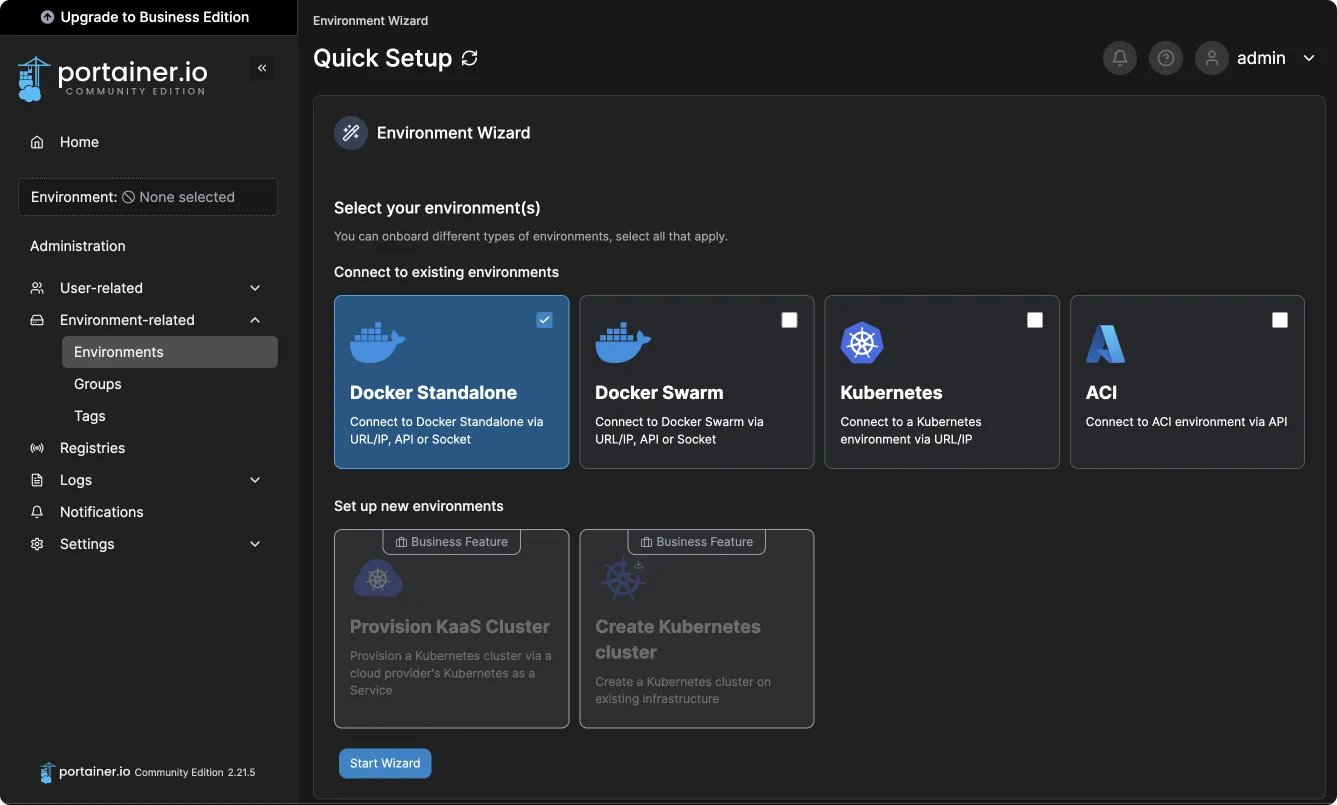
Setup Agent
Find the Linux & Windows WSL tab.
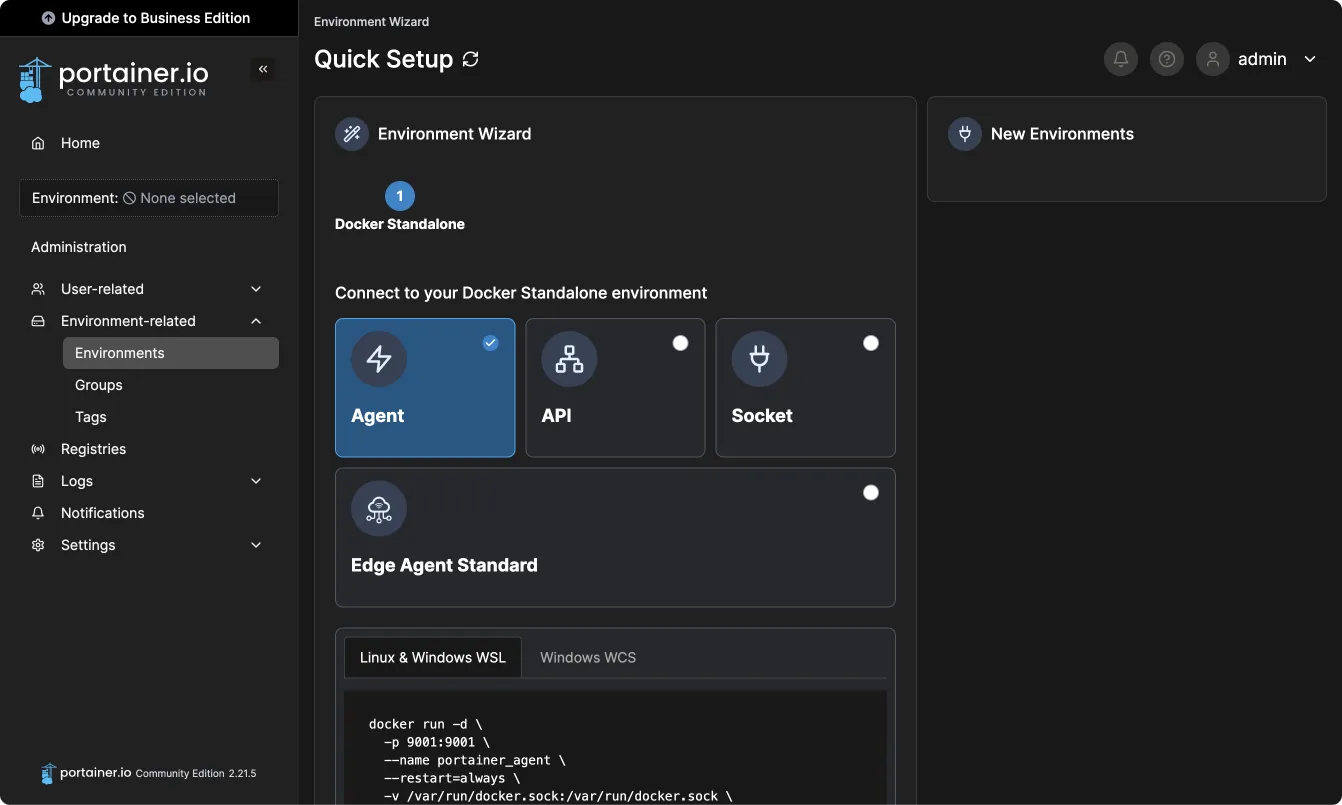
Copy command and execute in the shell of the node you want to connect.
docker run -d \
  -p 9001:9001 \
  --name portainer_agent \
  --restart=always \
  -v /var/run/docker.sock:/var/run/docker.sock \
  -v /var/lib/docker/volumes:/var/lib/docker/volumes \
  -v /:/host \
  portainer/agent:2.21.5
Fill Name and IP Address
Then fill this little form below with wanted name for this node and host IP, after that press connect.
Check if environment works
If you have done everything correctly, you should see the following on the Portainer home page.
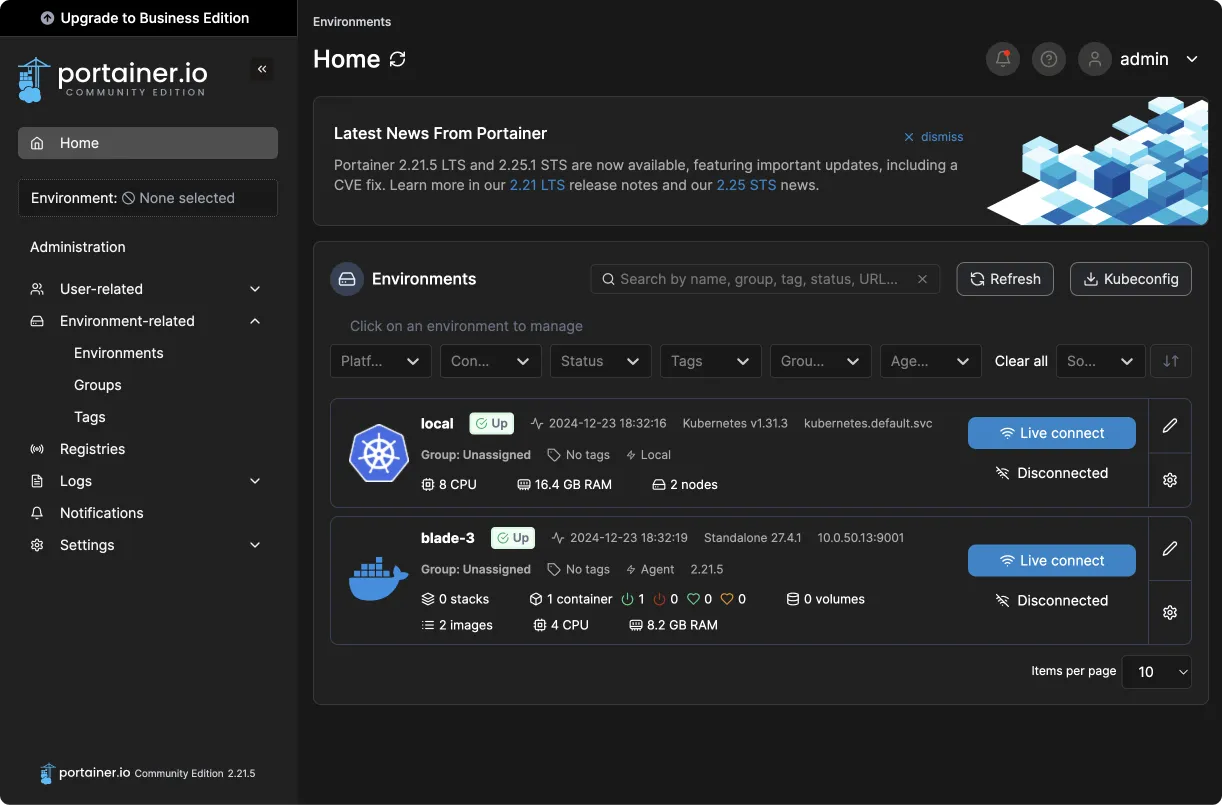
For more detailed instructions, please refer to this manual: Install Portainer CE with Docker on Linux | Portainer Documentation
Plex deployment
Plex is a media server software that turns your ComputeBlade into a personal streaming service, allowing you to organize and stream your movies, TV shows, and music across multiple devices.
Create storage folders
Before going to the Portainer UI, we need to prepare several folders to store configuration and media files on the node we just connected.
sudo mkdir -p /storage/media
sudo mkdir -p /storage/transcode
sudo mkdir -p /srv/plex/config
Once ready, we can start deploying plex to our node.
Create New Stack
Navigate to Stacks in the Portainer and create new one assigned to docker node (blade-3 in our example). Give it a name and copy the following docker compose in to the web editor.
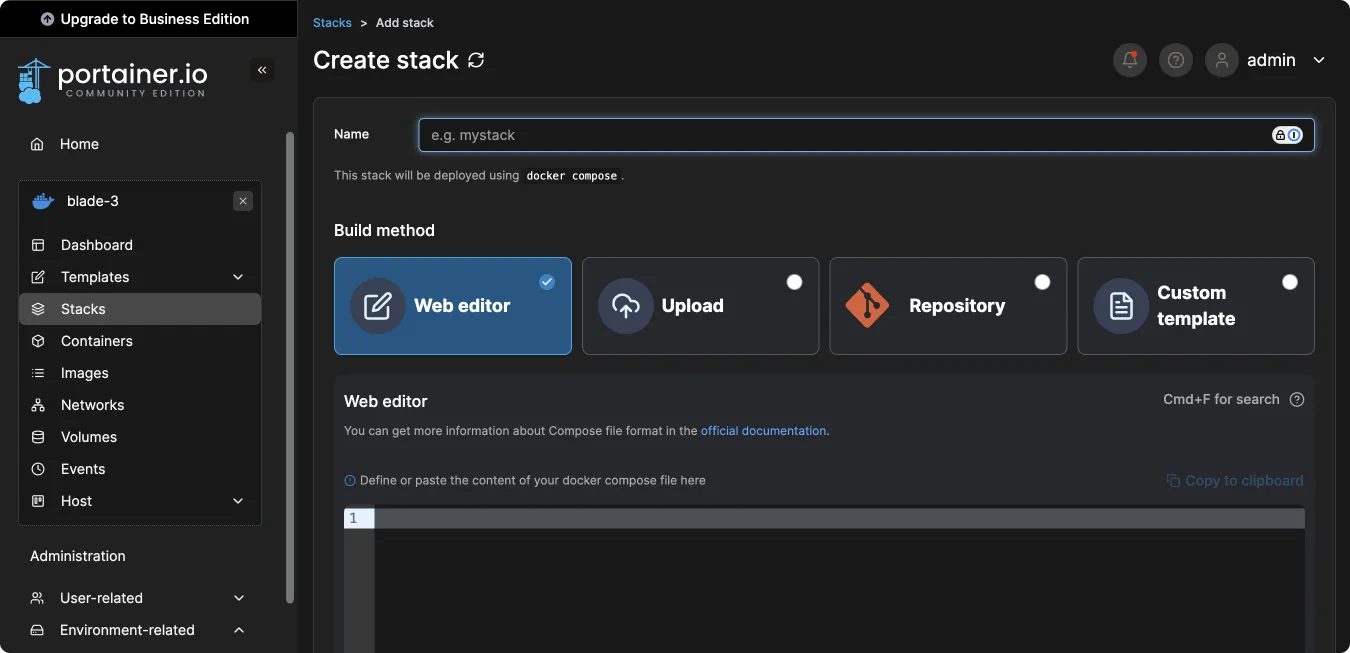
Add Config to Web Editor
Copy and paste the following configuration into the web editor.
version: "3.8"
services:
  plex:
    image: lscr.io/linuxserver/plex:latest
    container_name: plex
    restart: unless-stopped
    volumes:
      - /srv/plex/config:/config
      - /storage/transcode:/transcode
      - /storage/media:/data/media
    ports:
      - "32400:32400/tcp"
    devices:
      - /dev/dri:/dev/dri
    privileged: true
    pull_policy: always
Deploy the stack
Once ready press Deploy this stack.

Access Plex Web Interface
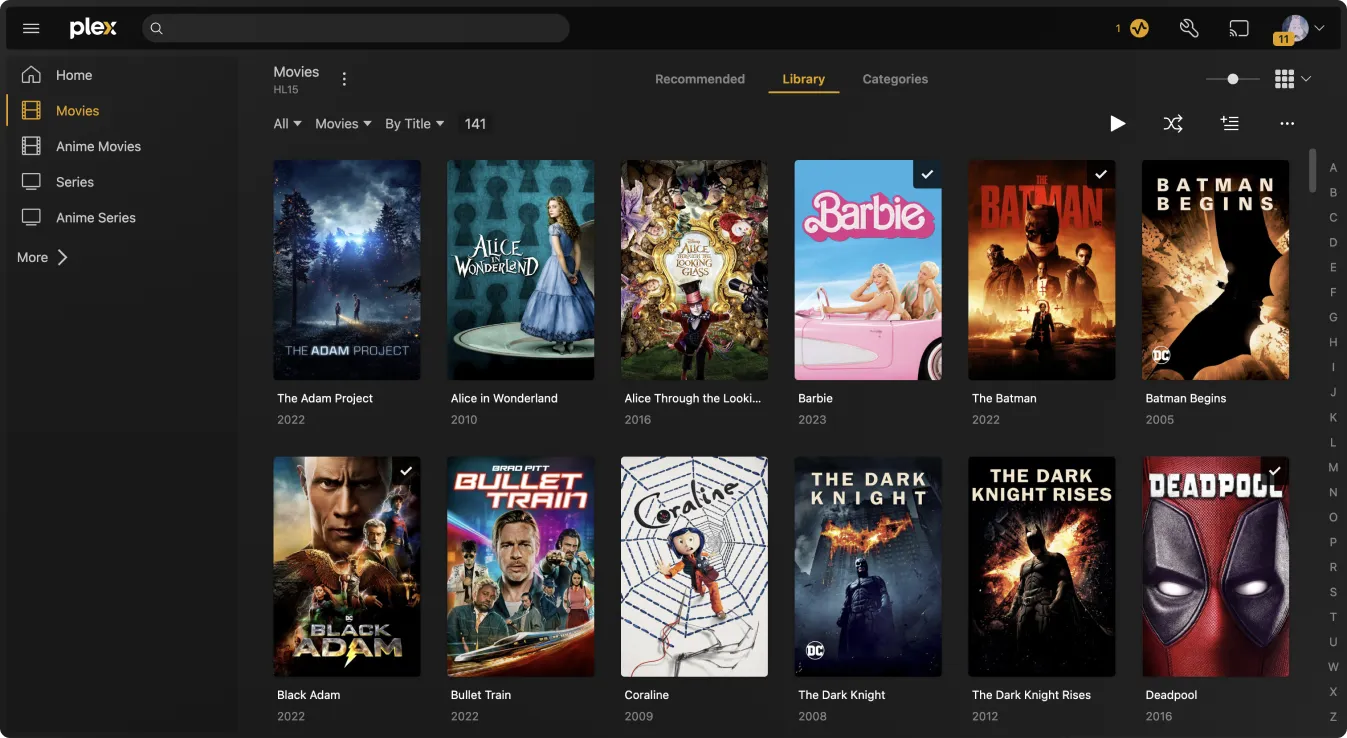
Now visit http://10.0.50.13:32400/ where IP address changed to the IP of the node. Once you add movies to your collection, it will look like this.
Resources
- Install Portainer CE with Docker on Linux | Portainer Documentation
- Install Docker Engine on Ubuntu | Dockerdocs
- Stacks = docker-compose, the Portainer way | Portainer.io
